Creating walls is important when drawing all types of plans. The control you have over the walls can help to speed up your design process and make it easier to manage your drawings. MacDraft has a bunch of tailored tools to help you draw and edit walls in your plans.
What We Will Learn
In this tutorial we will be learning how to use the new wall/parallel line tools using the following skills:
Download the Walls Tutorial.md70 file for this tutorial.
What are Parallel Lines?
Parallel lines are two lines who sit next to each other which if you extended them infinitely they would never meet. This is a mathematical description of what they are and although that is true, in MacDraft they are primarily used for creating walls in your floor plans and diagrams. For the rest of this tutorial I will refer to these lines/tools as both parallel lines and walls as there will be many of you that call them one or the other!
Getting Started
This tutorial requires you are running MacDraft PE or MacDraft Pro version 7.0.3. The reason for this is because the parallel line tools were massively improved in version 7.0.3, adding some new features and the issue of the drawing space moving when you select a parallel line has also been fixed.
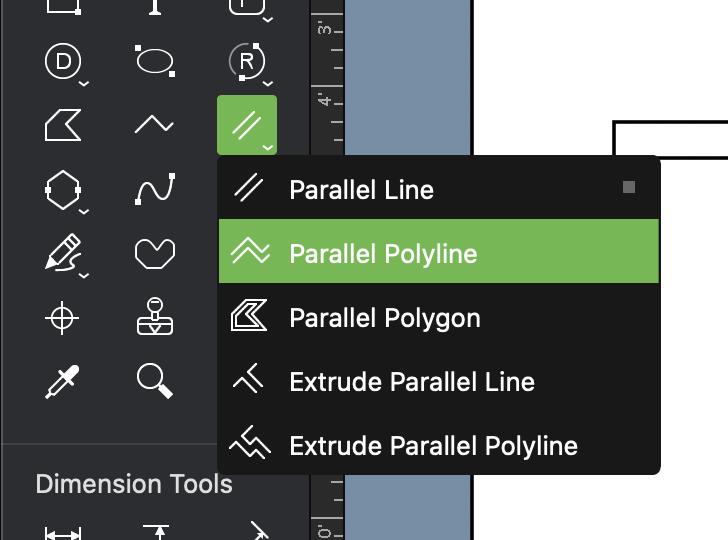
Above are the 5 different wall tools. Select the Parallel Line tool (you will see options apear at the top for the wall you are about to draw) and draw a single parallel line in the document. Select the parallel line when you have placed it and you will see the right panel change to show you your options.
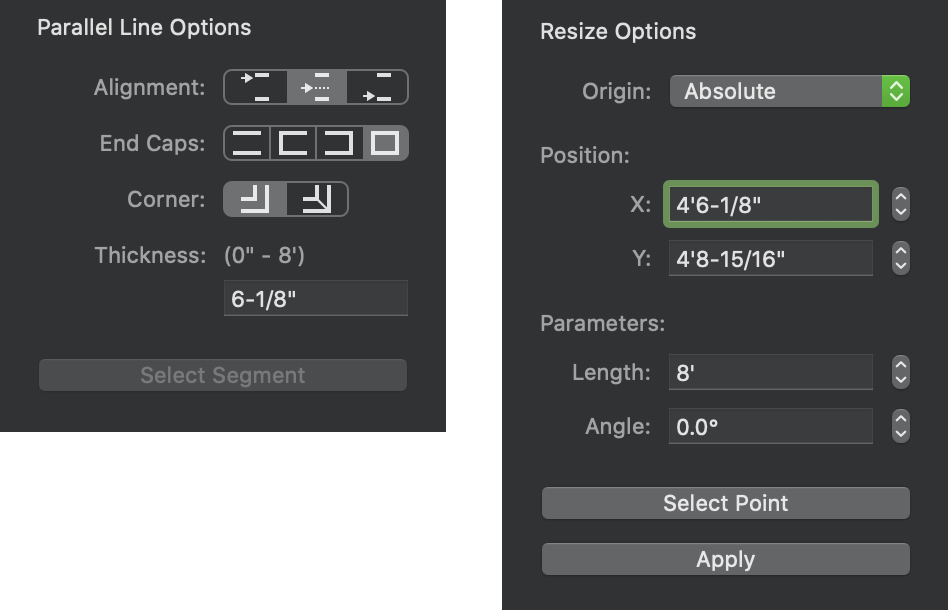
Parallel Line Options
Resize Options
Now we have taken a look at all the tools and options, let’s play around with parallel lines in MacDraft.
Step 1 - Drawing Parallel Lines (Single Walls)
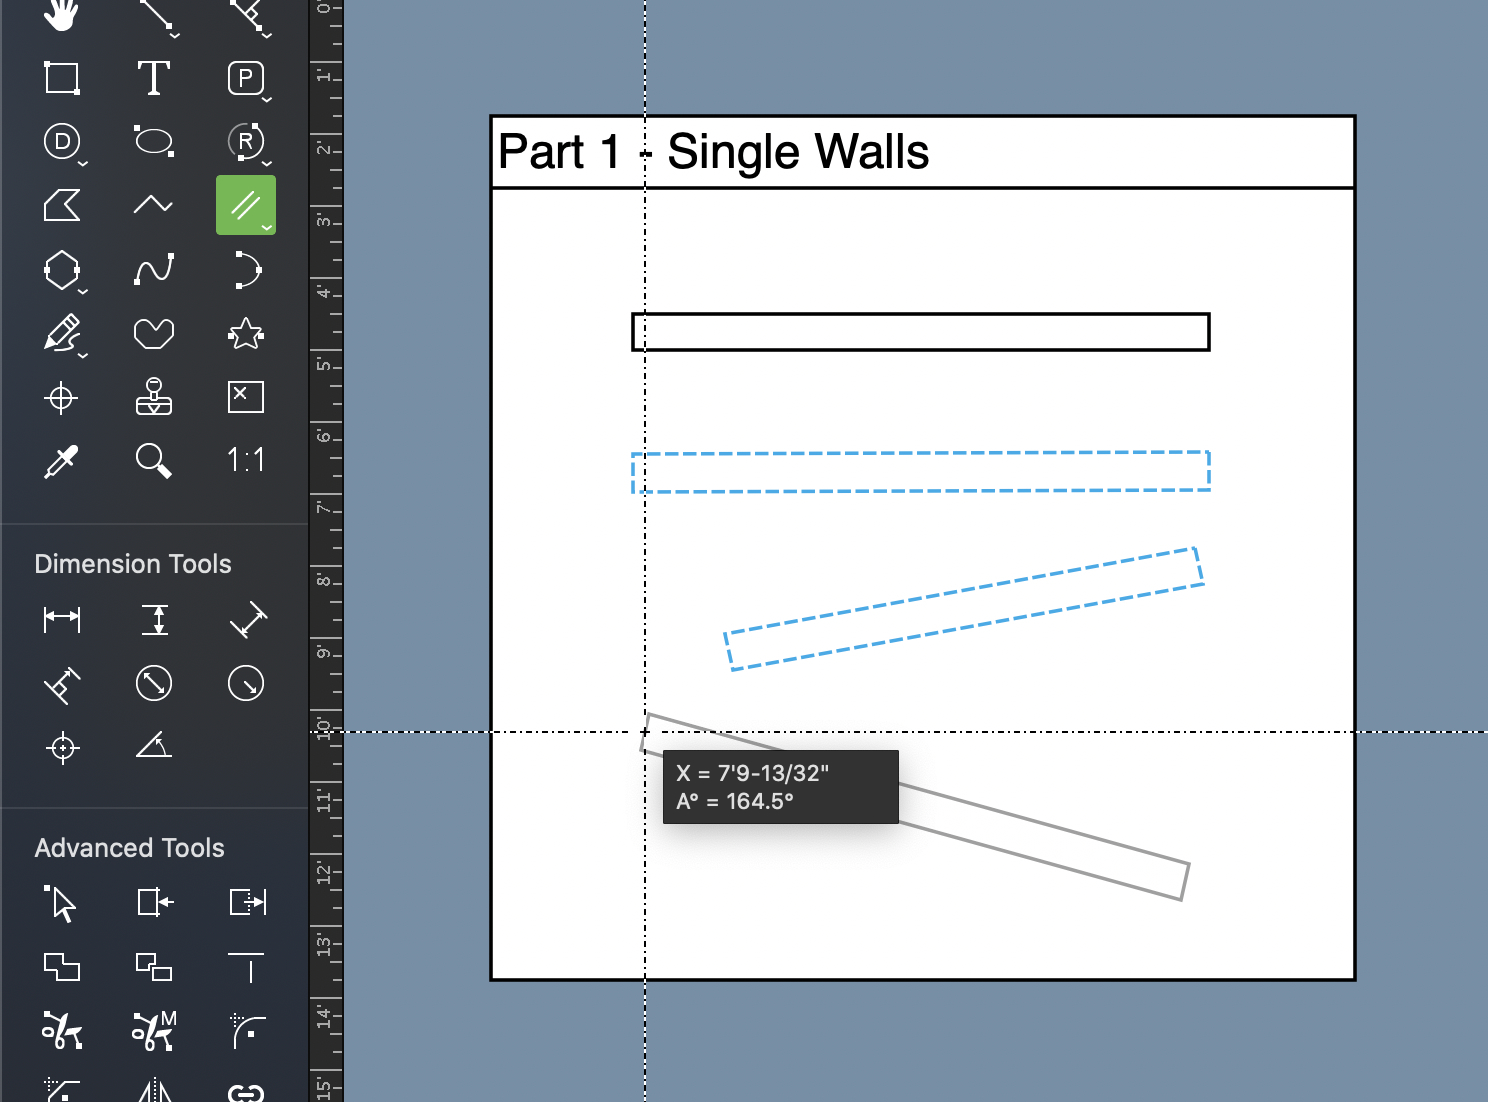
Open the Walls Tutorial.md70 file accompanying this tutorial. When it opens up you will see 6 rectangles, zoom in and focus on part 1.
Select the single parallel line tool (first tool) and practise drawing a couple of lines in the box. Try drawing at angles and changing their options before you draw and after your draw. Once you are happy with which options you prefer to draw with, you can move onto the next part.
Step 2 - Drawing Parallel Polylines (Open Walls)
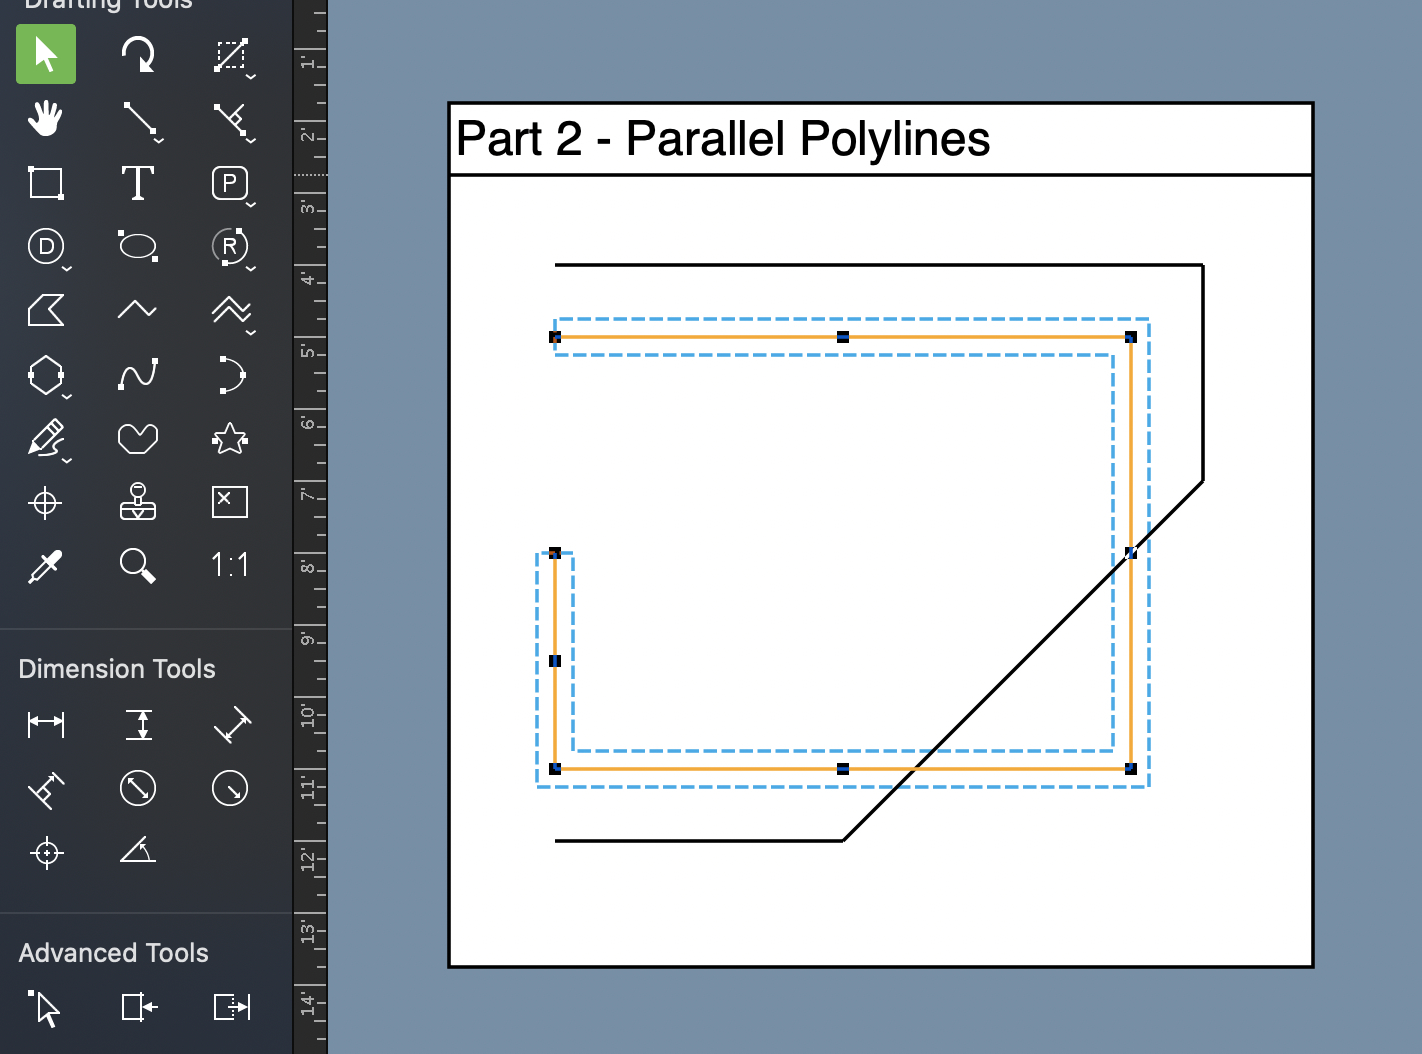
In Part 2 select the Parallel Polyline tool. This allows us to create a chain of walls.
You will notice a set of black lines and a set of orange lines in part 2. With the Parallel Polyline tool selected, use the black line as a guide and click on the end points of the black lines to create the shape in the first image below. To end the polyline, double click when placing your final point.
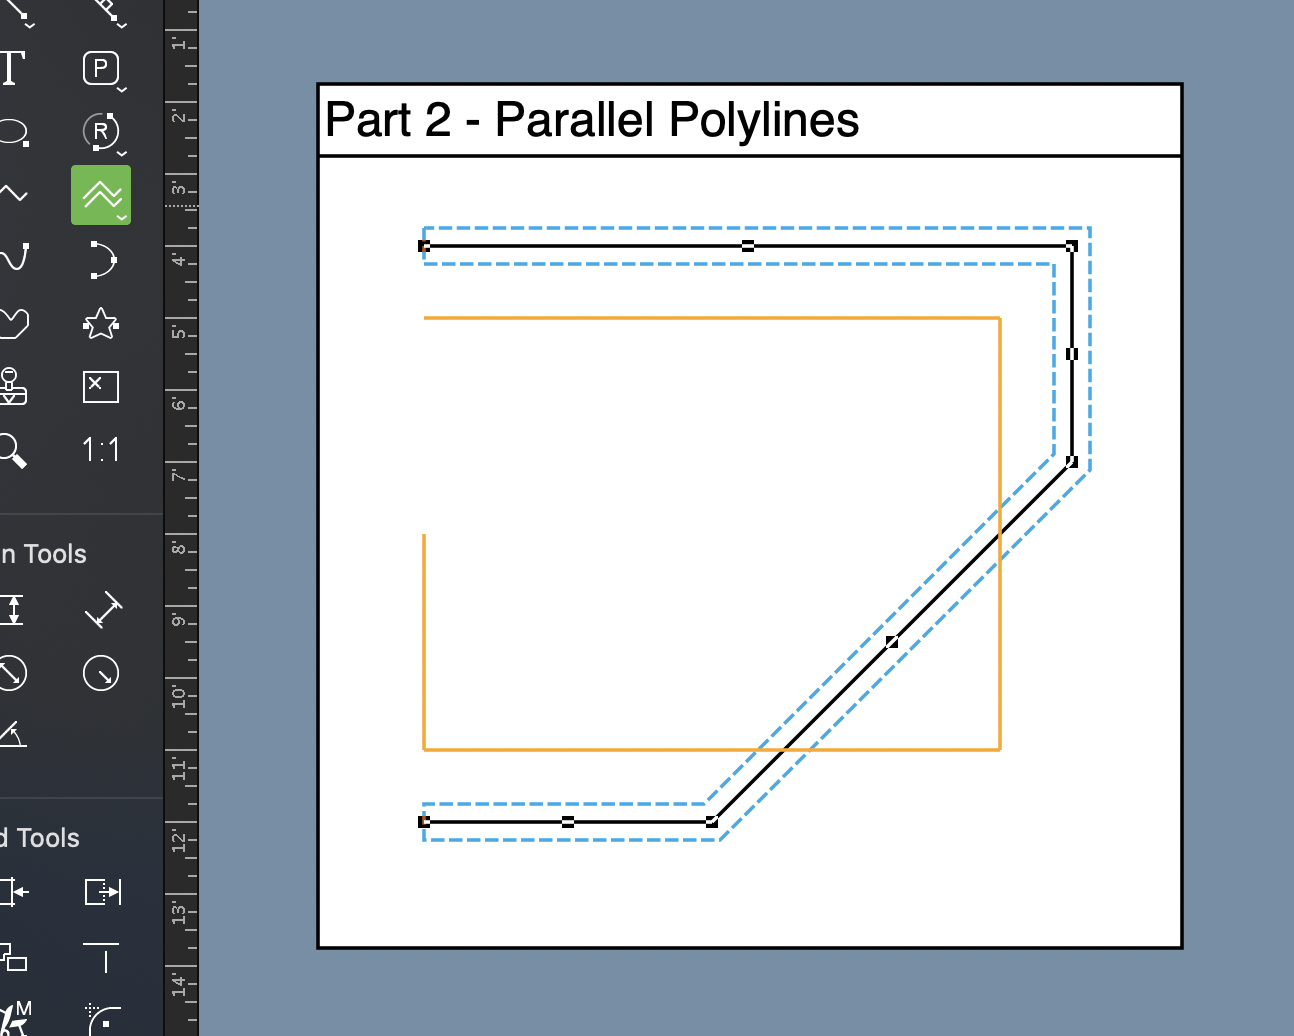
Make sure the Arrow tool is selected and click the parallel polyline you have just drawn to select it. You will see editing handles on the parallel line, select and drag the handles and line them up with the orange line. This is a way of manually moving and editing walls in MacDraft 7.
Step 3 - Drawing Parallel Polygons (Closed Walls)
In Part 3, select the Parallel Polygon tool and follow the lines to create a room. This tool works in the same way as the parallel polyline too, so double click to place the last point (the last point is the one before the point you placed first, as the connecting wall is created automatically for you).
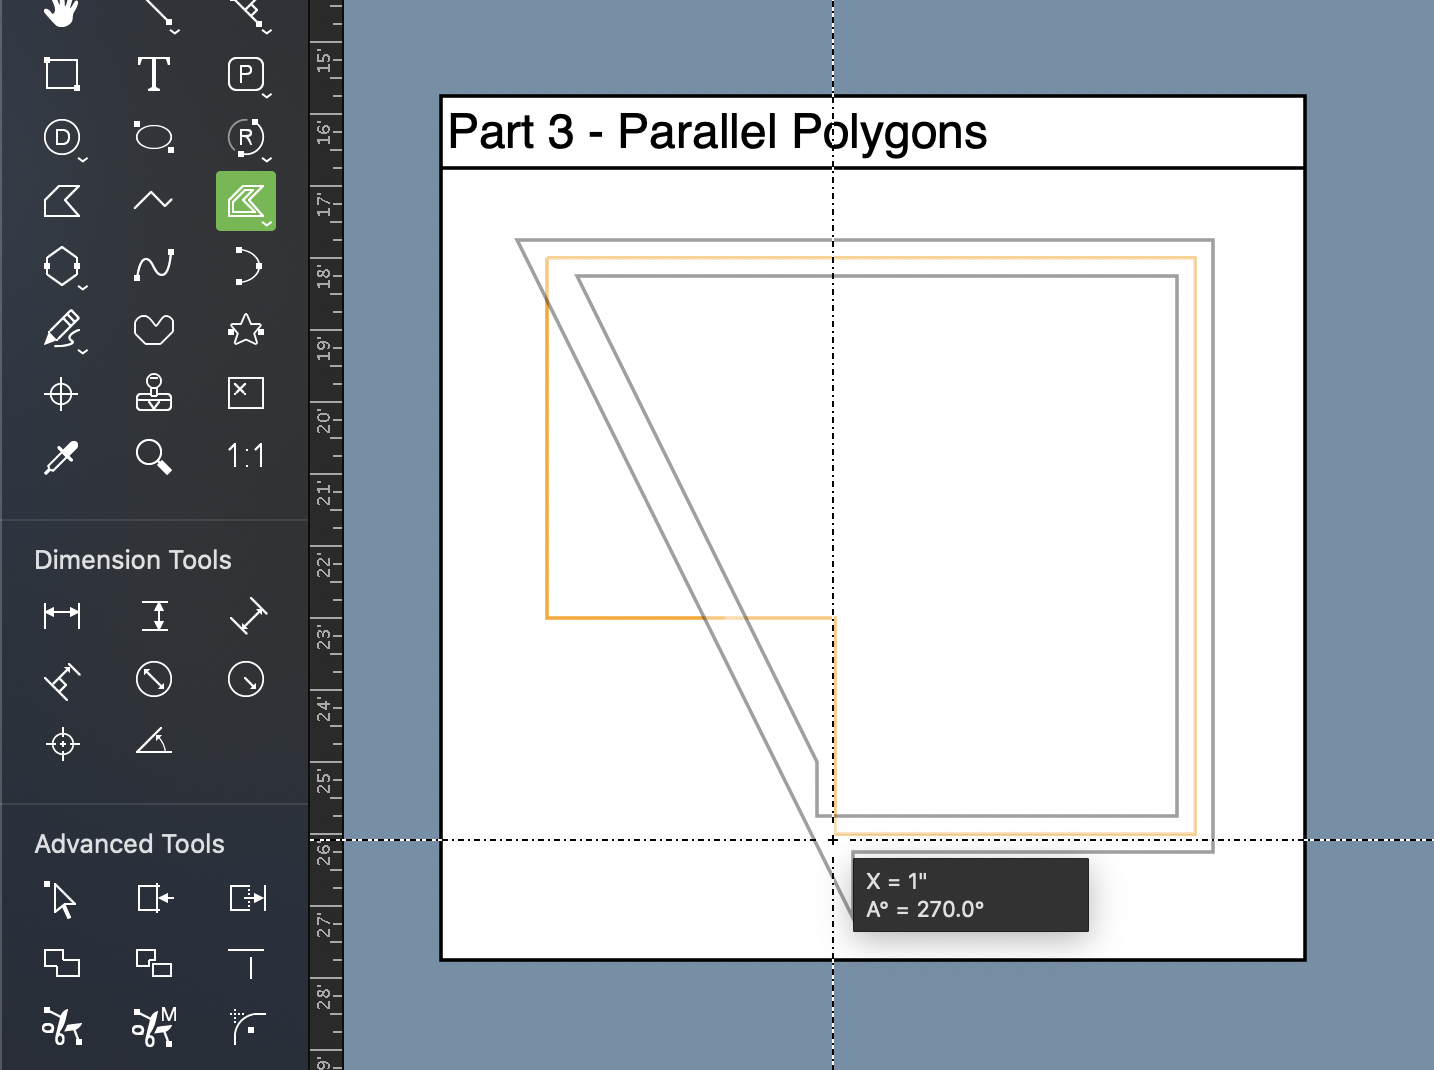
With the Arrow tool active, select the room and use the options in the right panel to add corners and change other options. By default the thickness of the wall should be 6-1/8”, change this to 8’ and notice all walls change size.

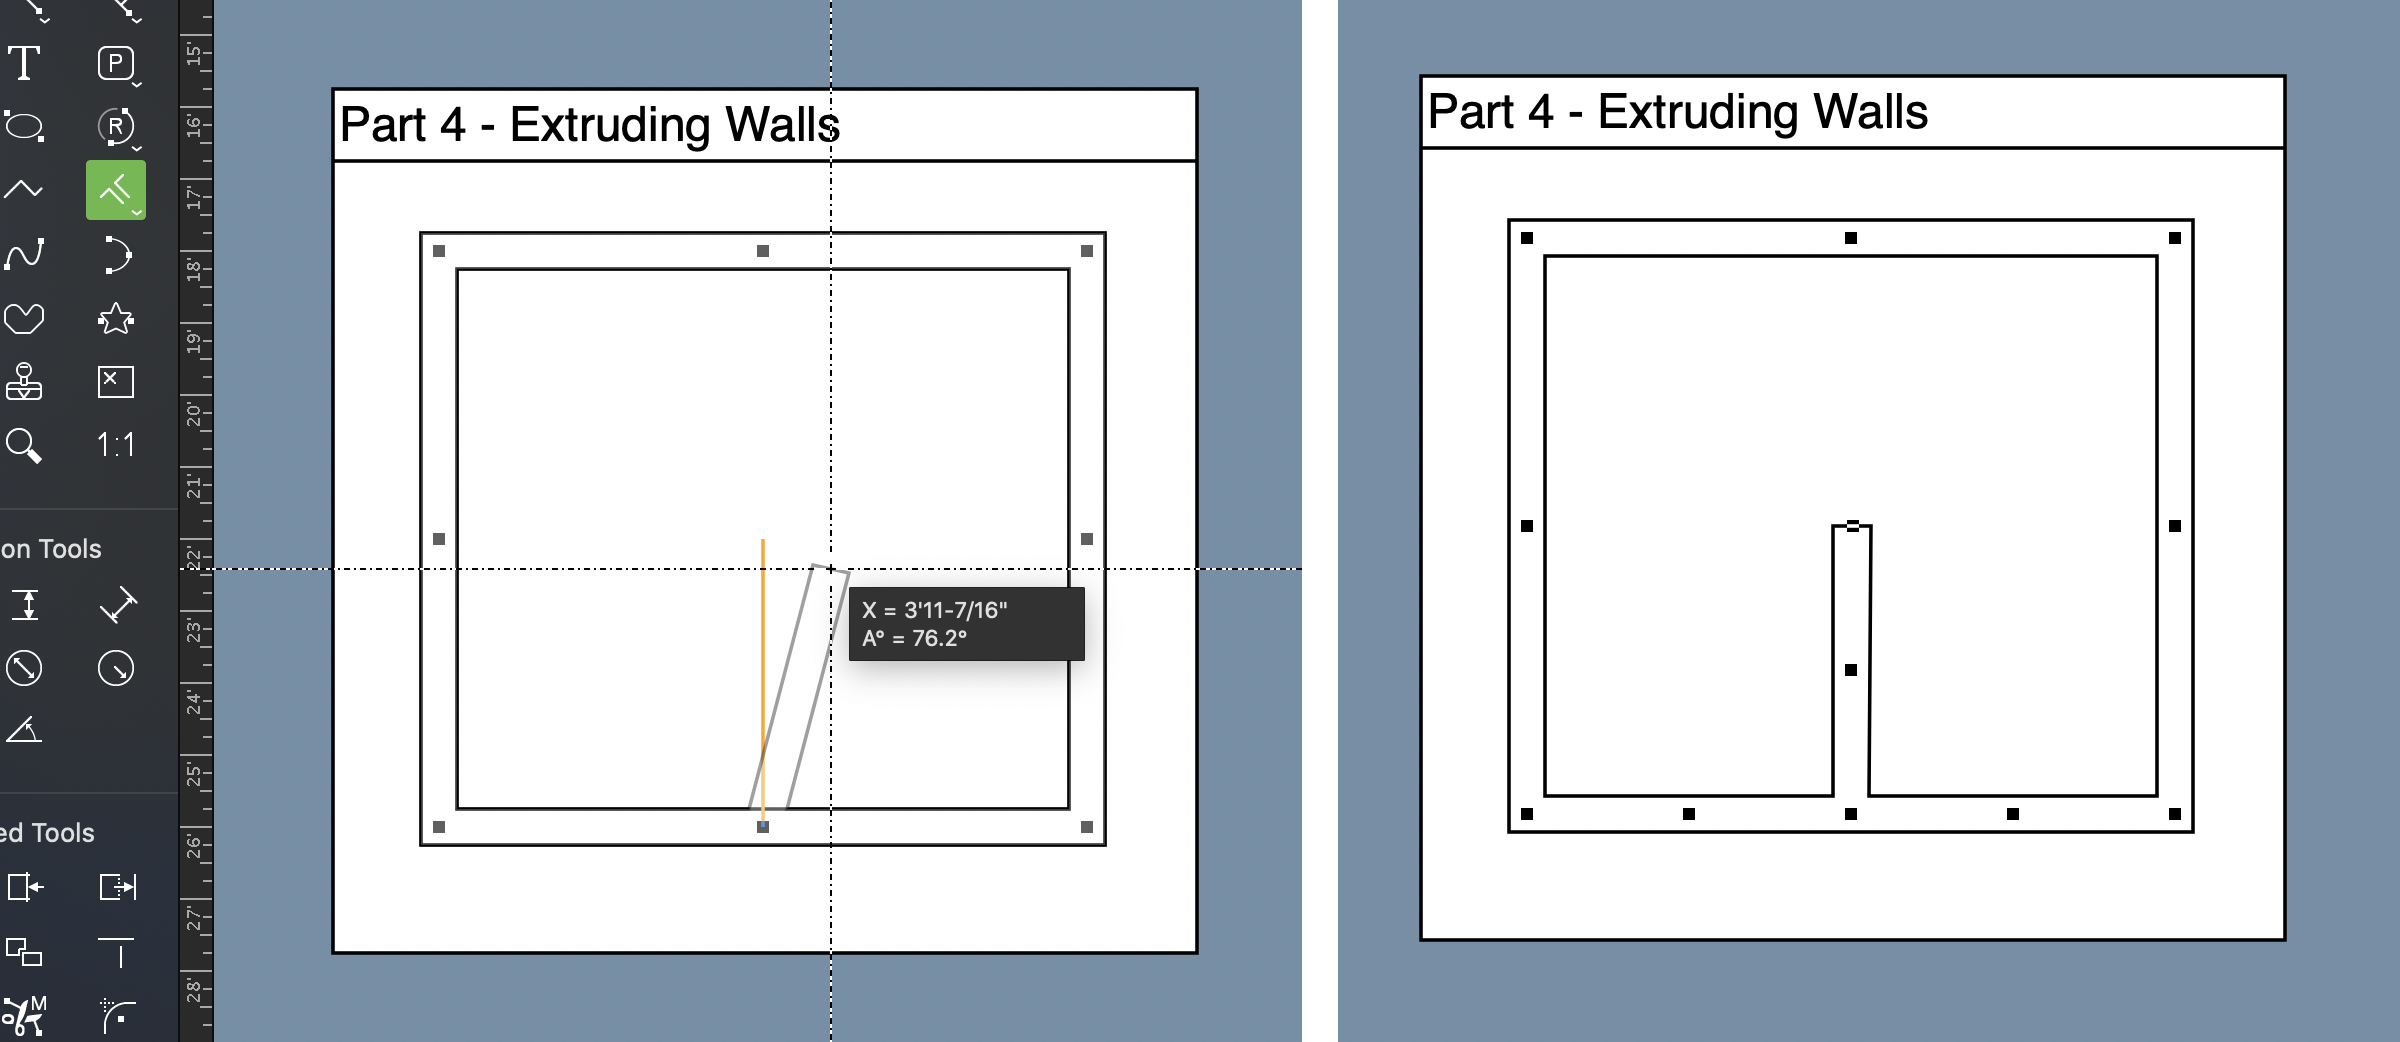
Step 4 - Extruding Parallel Lines (Adding single walls to existing walls)
In Part 4 select the pre drawn room and then the select the Extrude Parallel line tool. Move your cursor towards where the line meets the room and click, make sure you click the wall and not the line. The wall will start to draw, place it on the other end of the line.
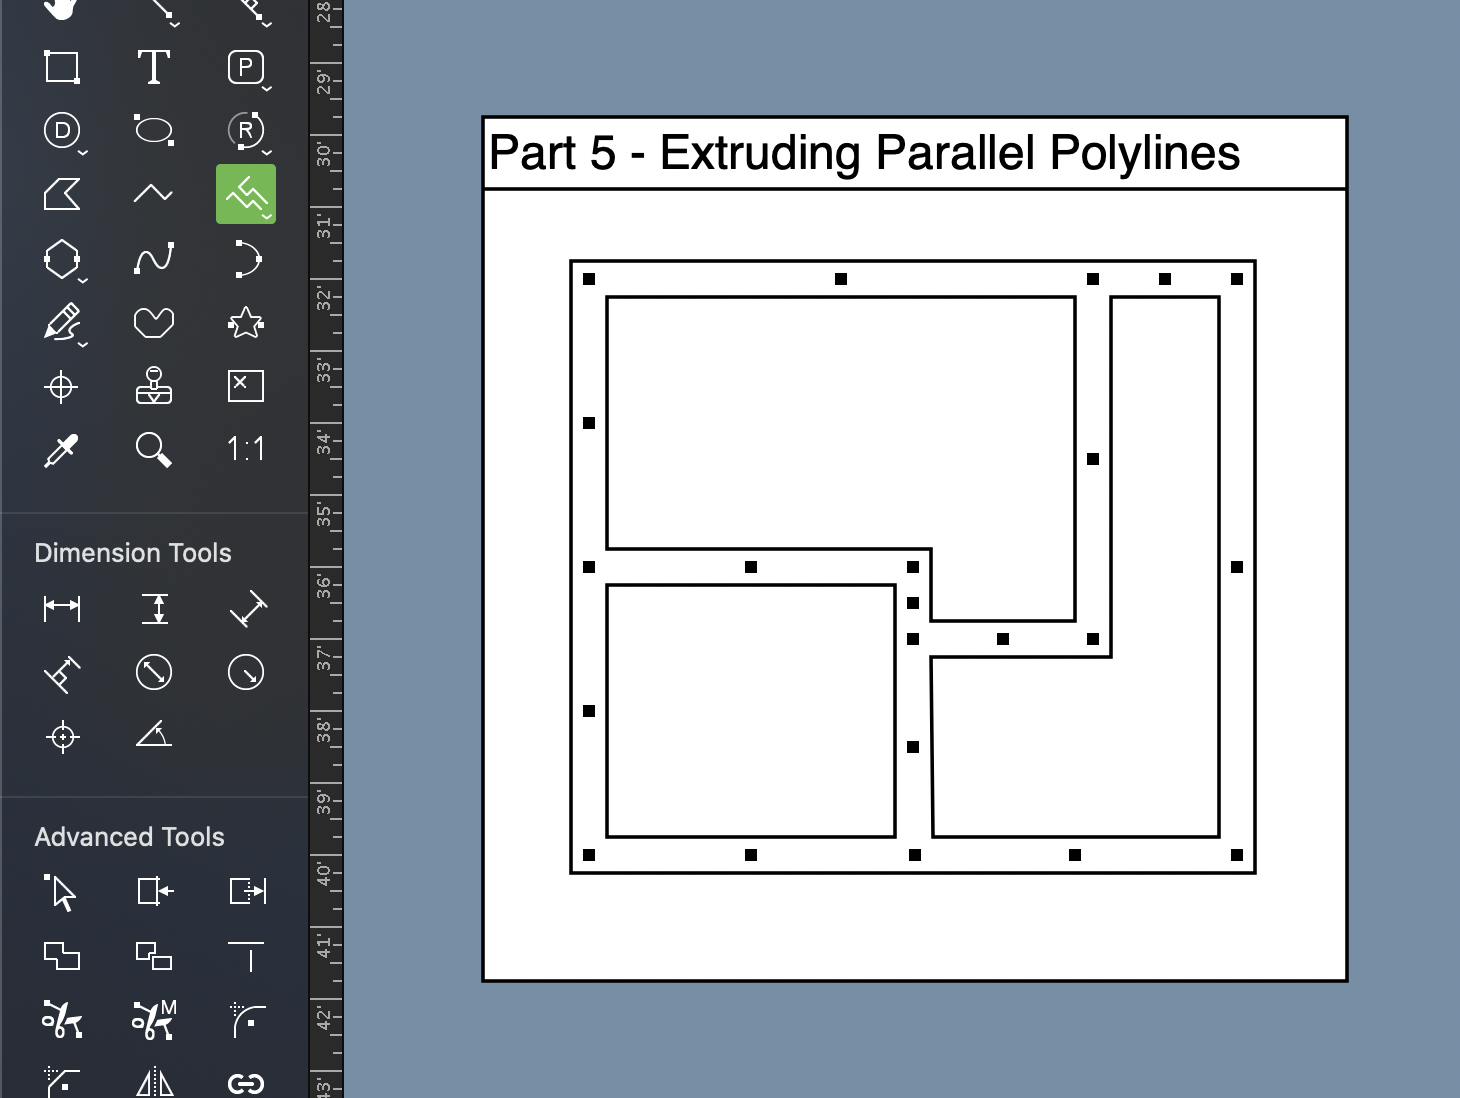
Steps 5 - Extruding Parallel Polylines (Adding multiple walls to existing walls)
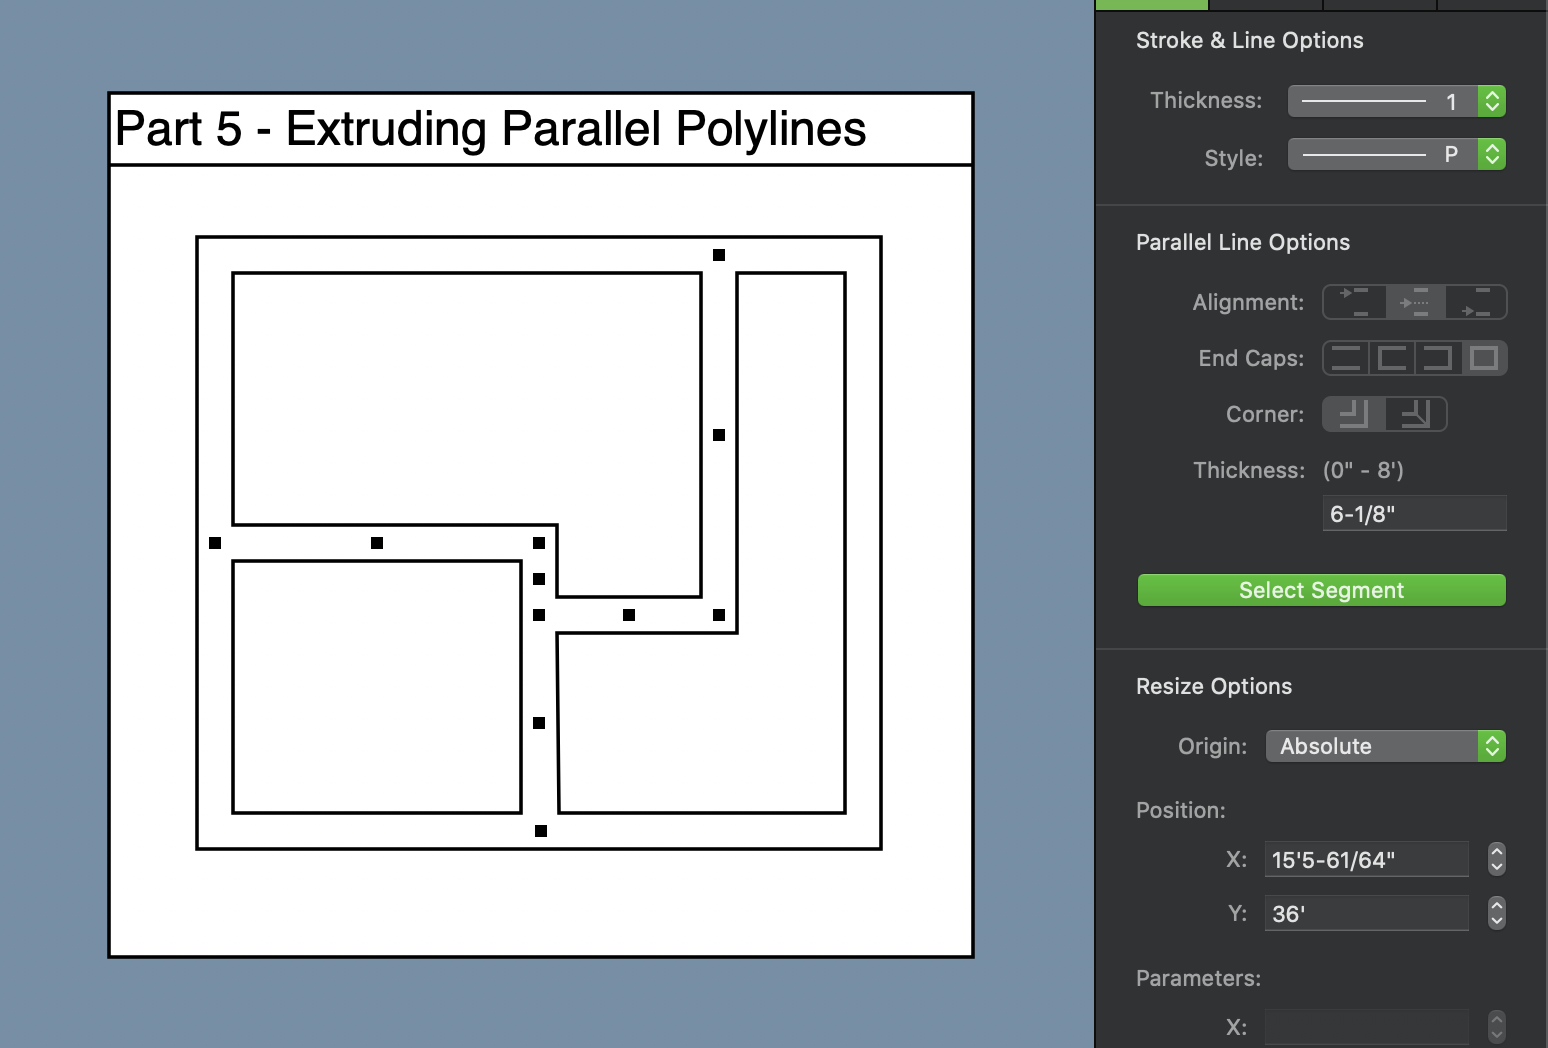
In Part 5 select the pre drawn room and choose the Extrude Parallel Polylines tool. This tool works in the same way as the others. The orange lines can be used as a guide, lets do the left square walls first. Click the mouse at the bottom part of the wall, move the mouse up and click the second point, then move the mouse left and click the walls again. The first extra walls will be added.

Make sure the new set of walls are selected again and with the Extrude Parallel Polylines tool click where the right horizontal lines meets the wall, drag the mouse to the next point and click, then drag the mouse up and click on the wall again. This will add a new section to the walls.
Steps 6 - Editing the wall thickness
Select the walls you have just created and go to the Properties tab in the right panel. Locate the Select Segment button and click it. Now move the mouse to the individual walls you want to change the thickness of and click them. You can hold the Shift key down while clicking the walls to select more than one.
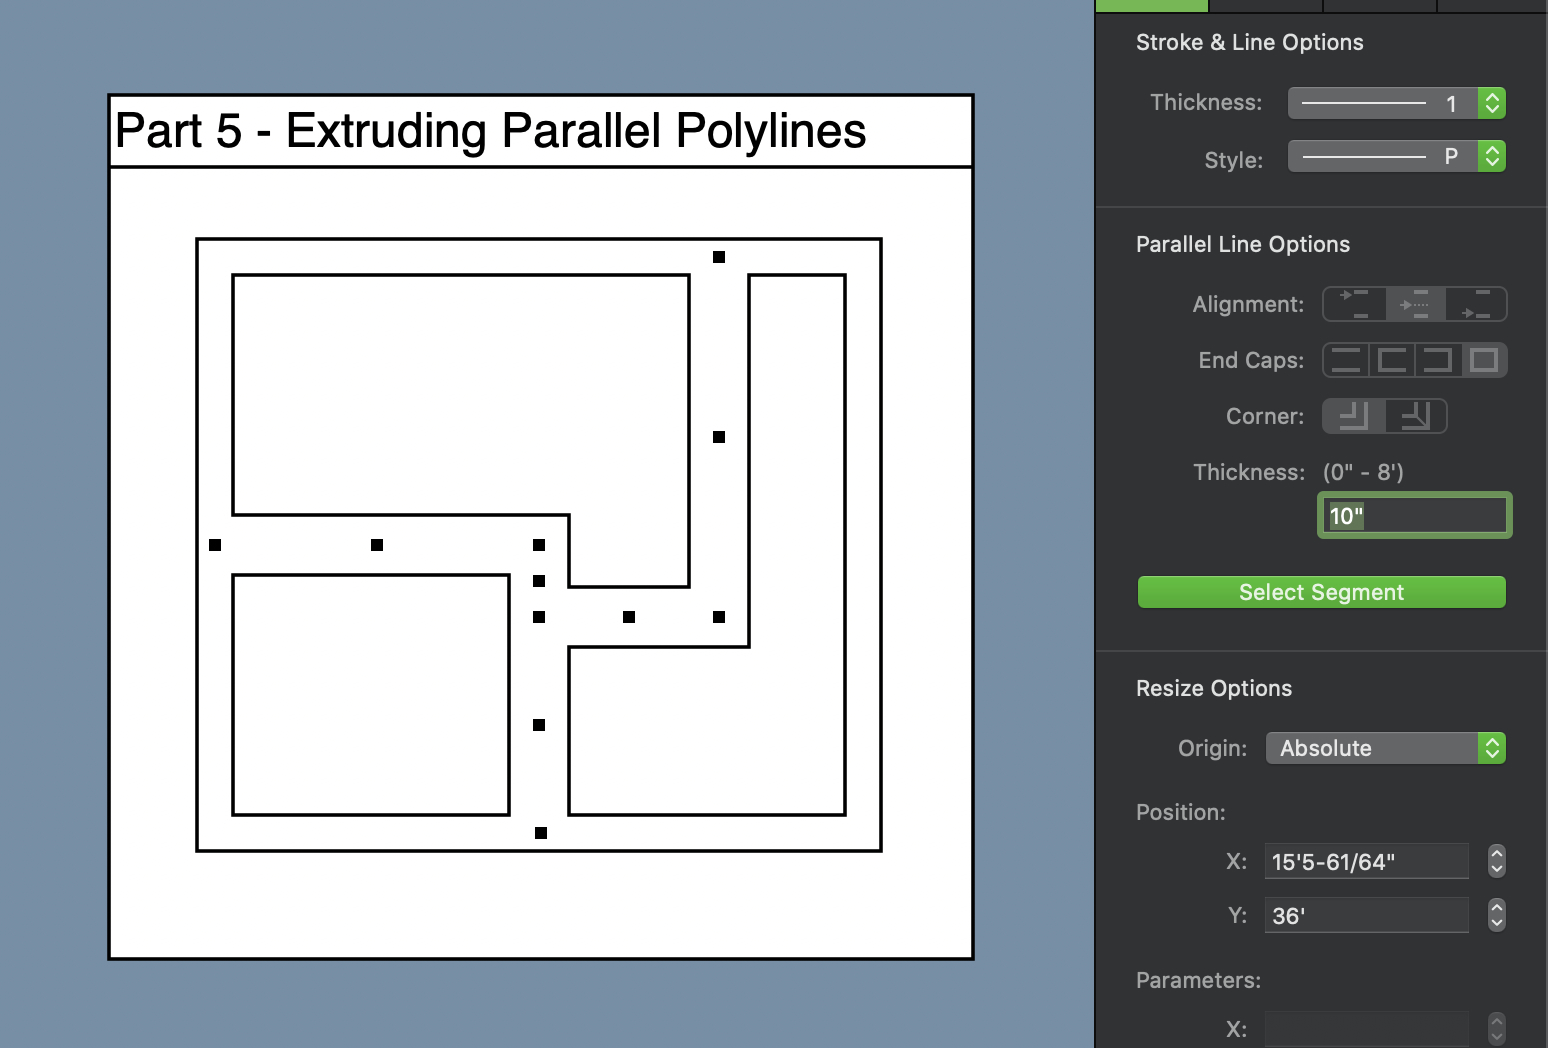
Now you have the walls you want to change the thickness of selected, go back to the Parallel Line Options in right panel, enter a new value in the Thickness field and press the enter key. The new thickness will be applied to the walls you had selected. To exit the thickness editing mode, either click the Select Segment button again, or press the Escape key on your keyboard.
Summary
Combining all of these tools you should be well placed in your next project to create rooms, walls and floor plans! Remember if you have any questions or ideas for new tutorials you can let us know here.