Dimensions are perfect for showing the true size of your shapes and objects in your MacDraft document. You can also use the dimension tools to measure walls, doors and other areas of drawings that have been sent to you.
What We Will Learn
In this tutorial we will be learning how to use Dimensions using the following skills:
Download the Welding Bracket.md70 file for this tutorial.
Step 1 - Overview of the Dimension Tools
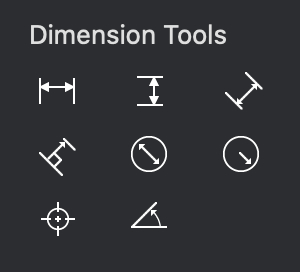
The dimension tools are located on the left panel below the drawing tools. There are 8 different tools in total, each one allowing you create dimensions from different types of data. From Left to Right these are:
Step 2 - Creating dimensions
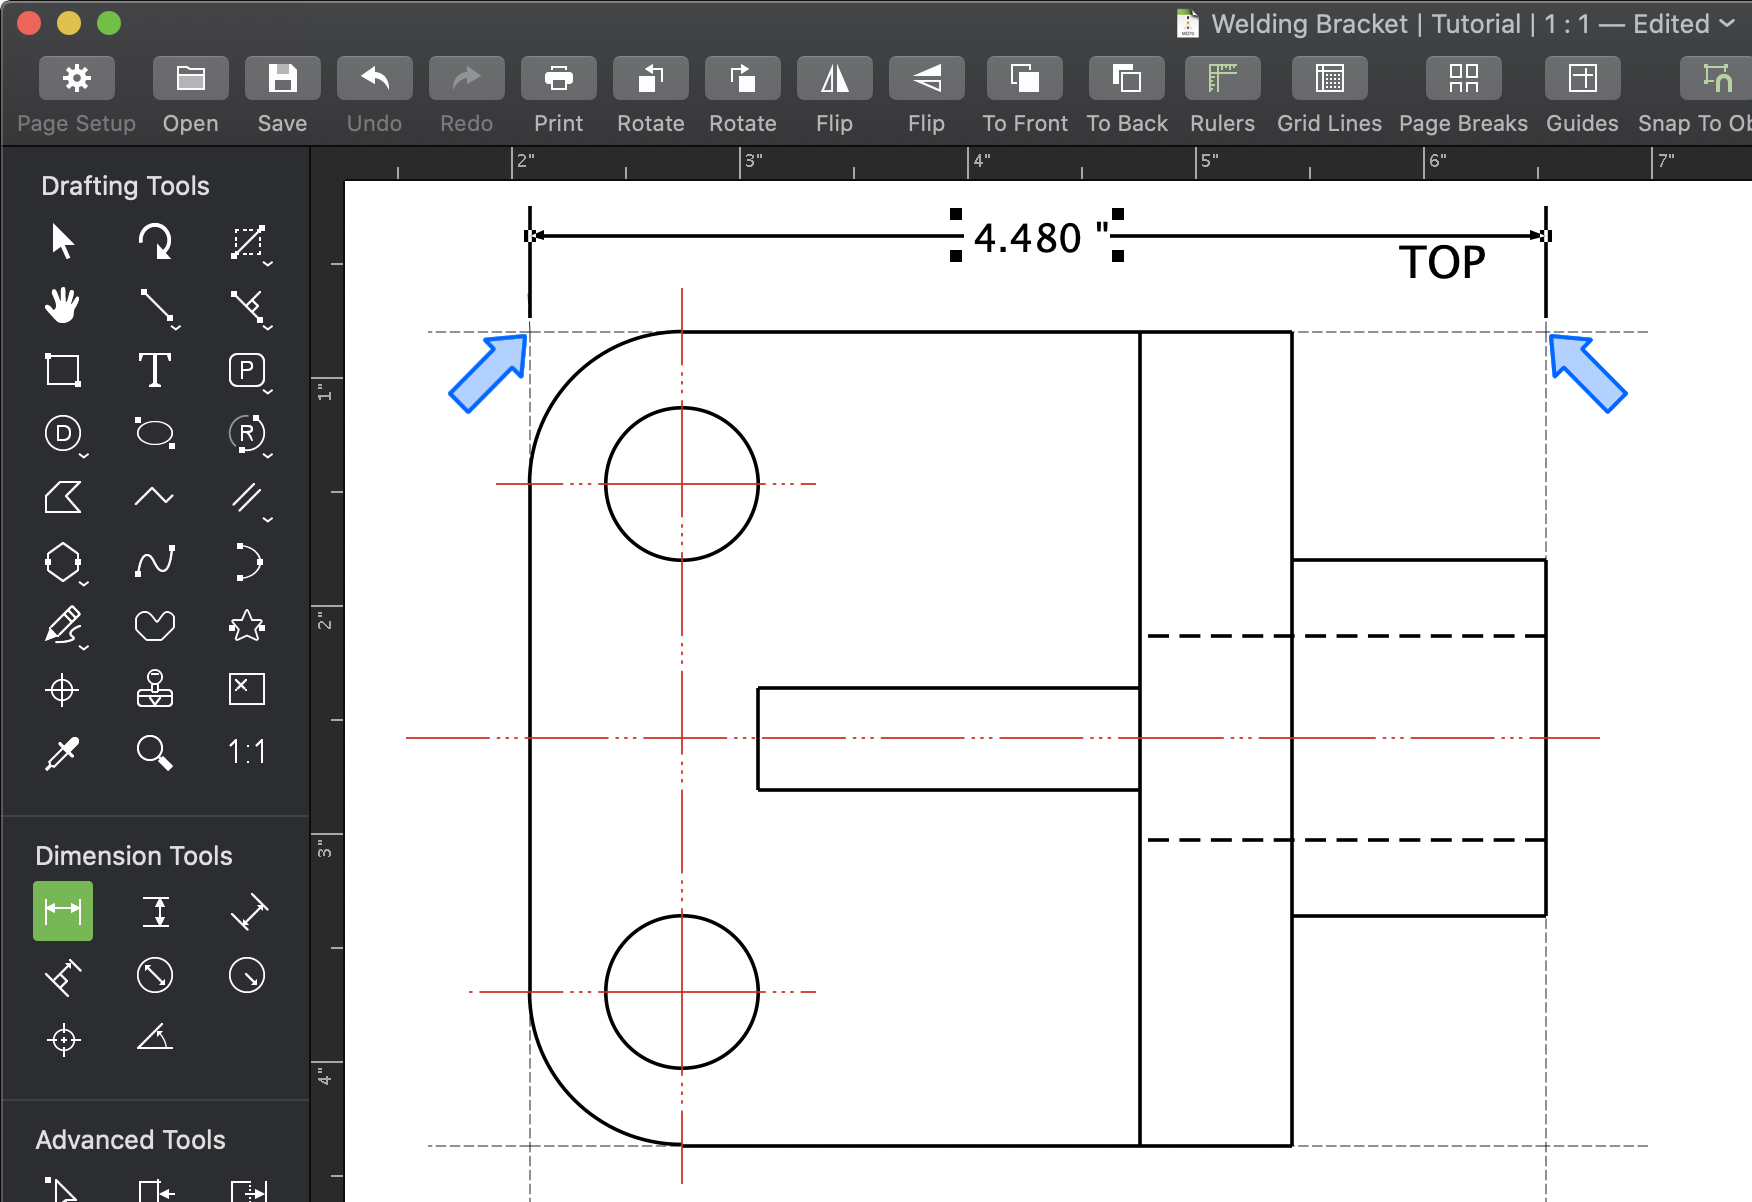
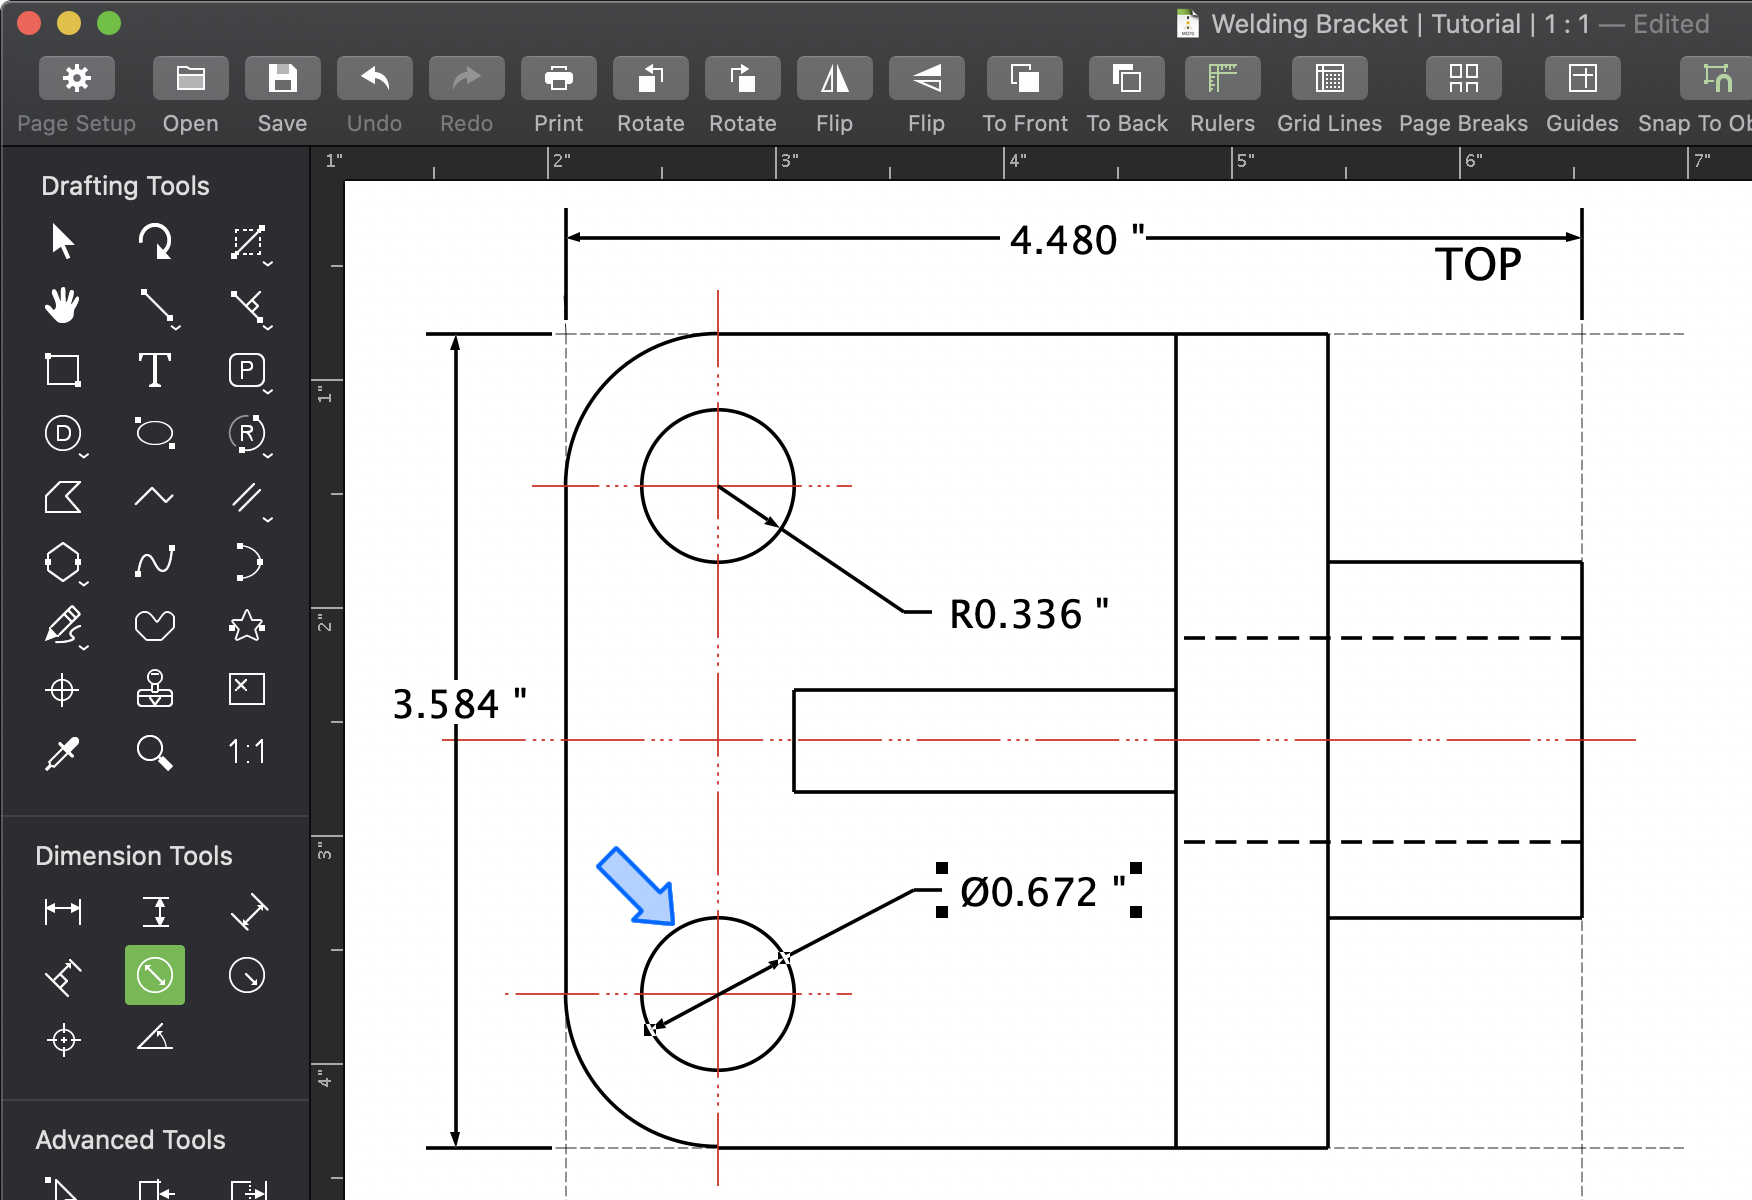
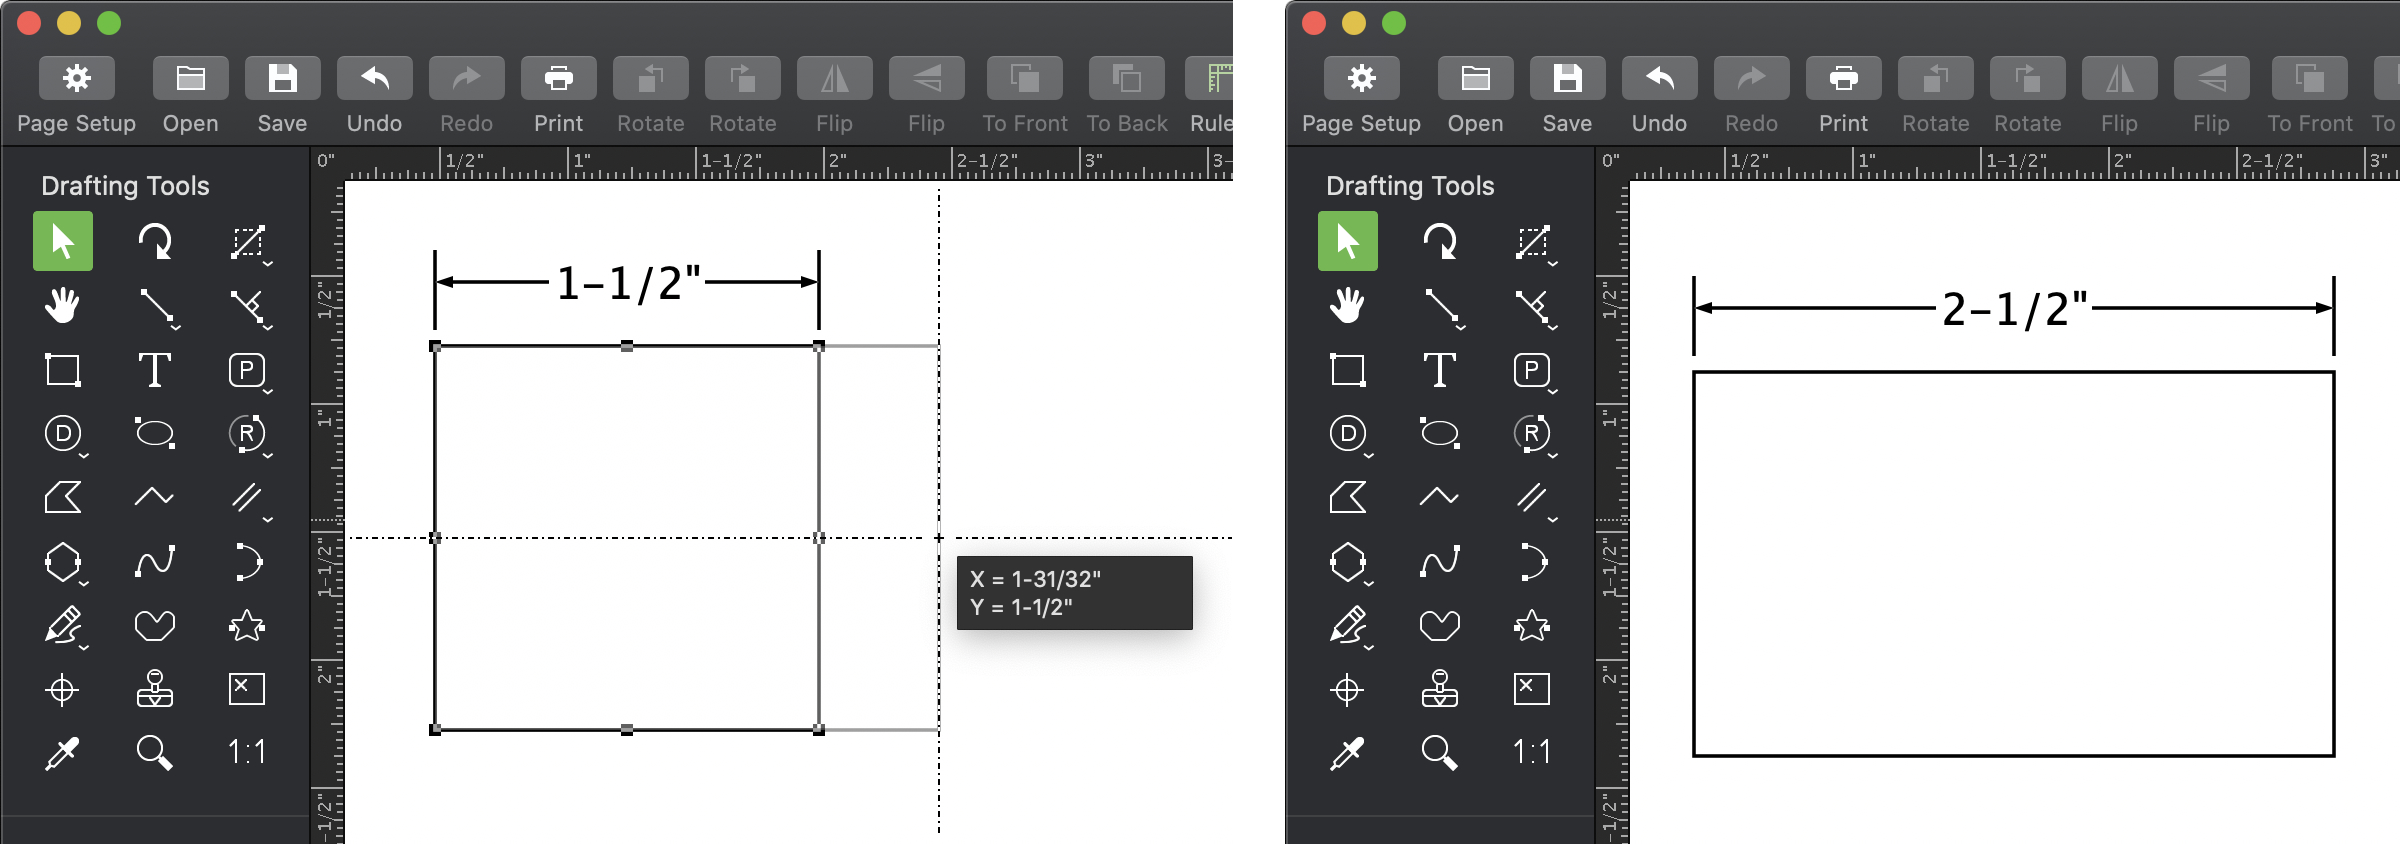
Open the Welding Bracket.md70 file. Lets create a Horizontal Dimension which shows the total length of the bracket in the top view.
Step 3 - Alignment
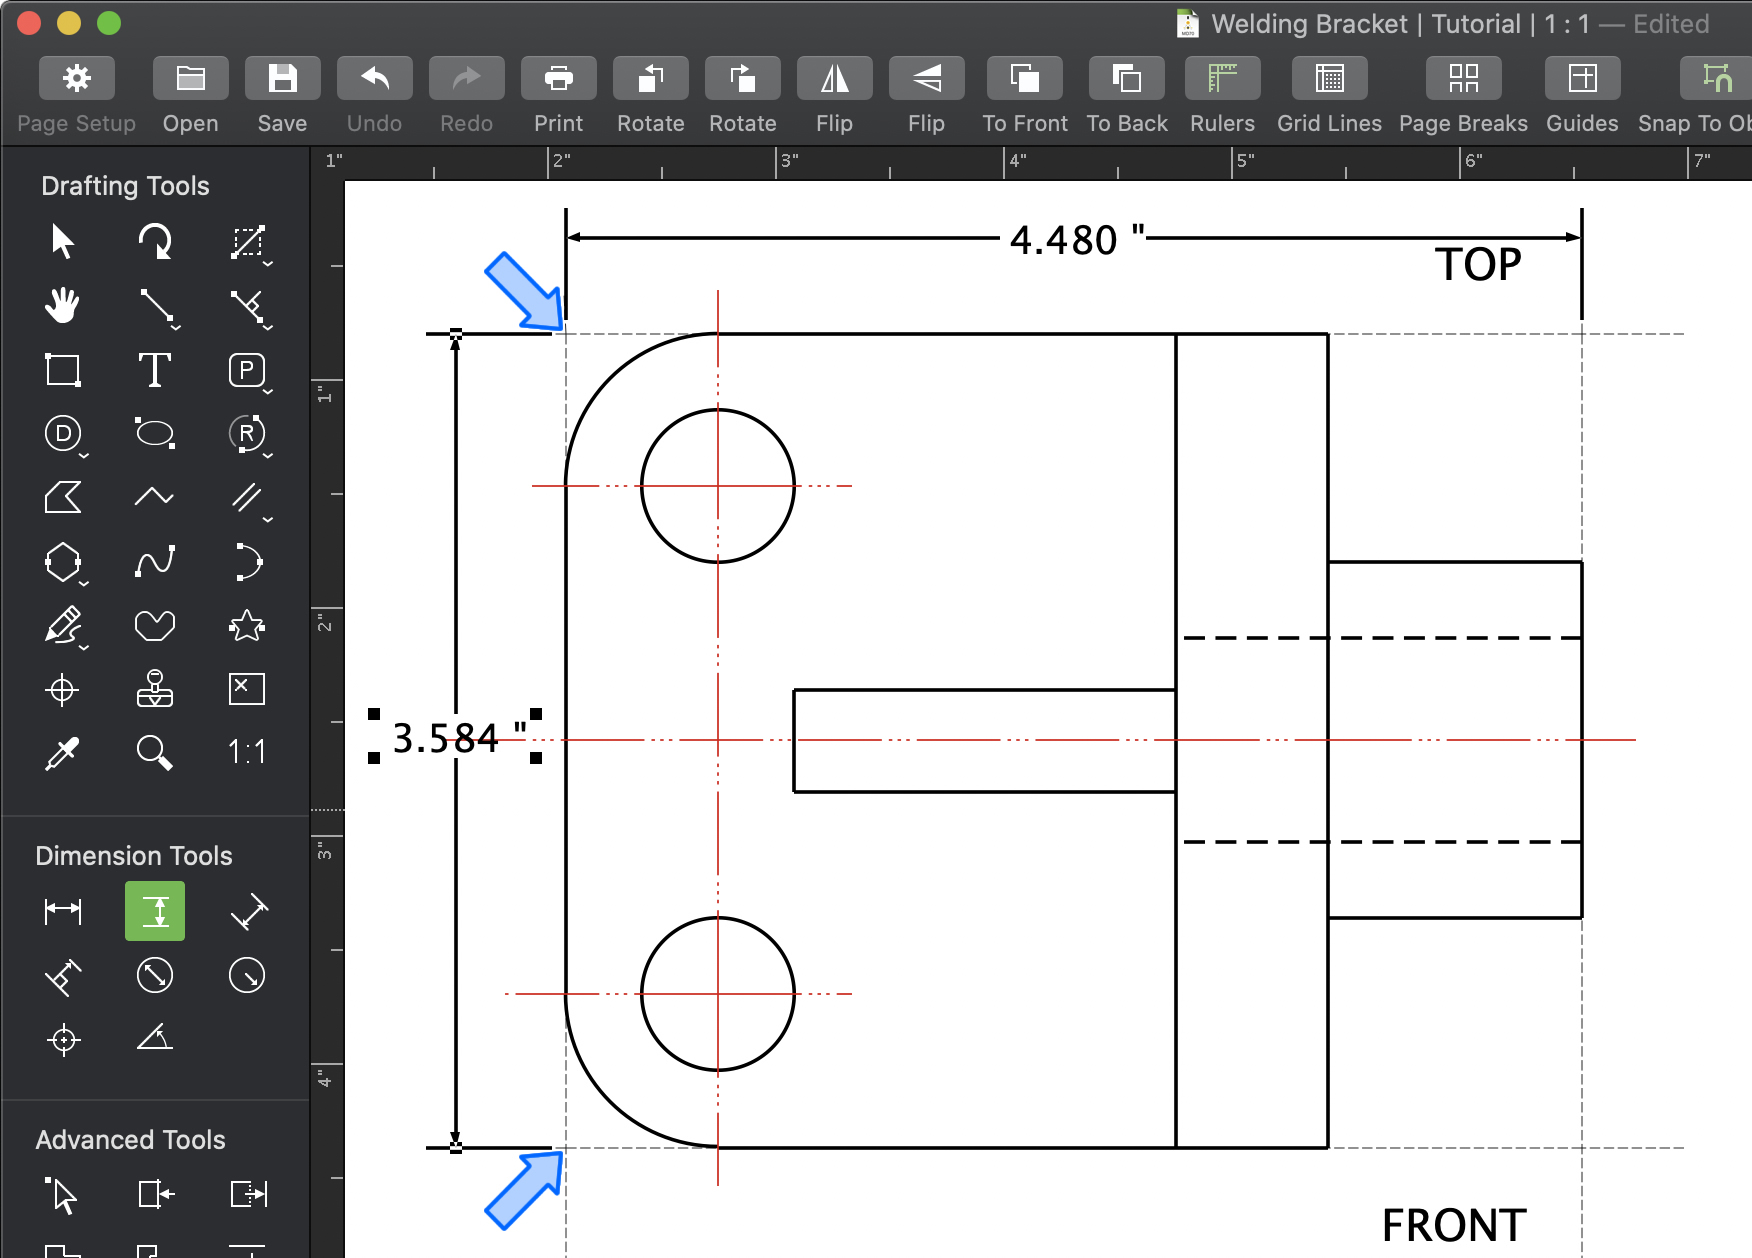
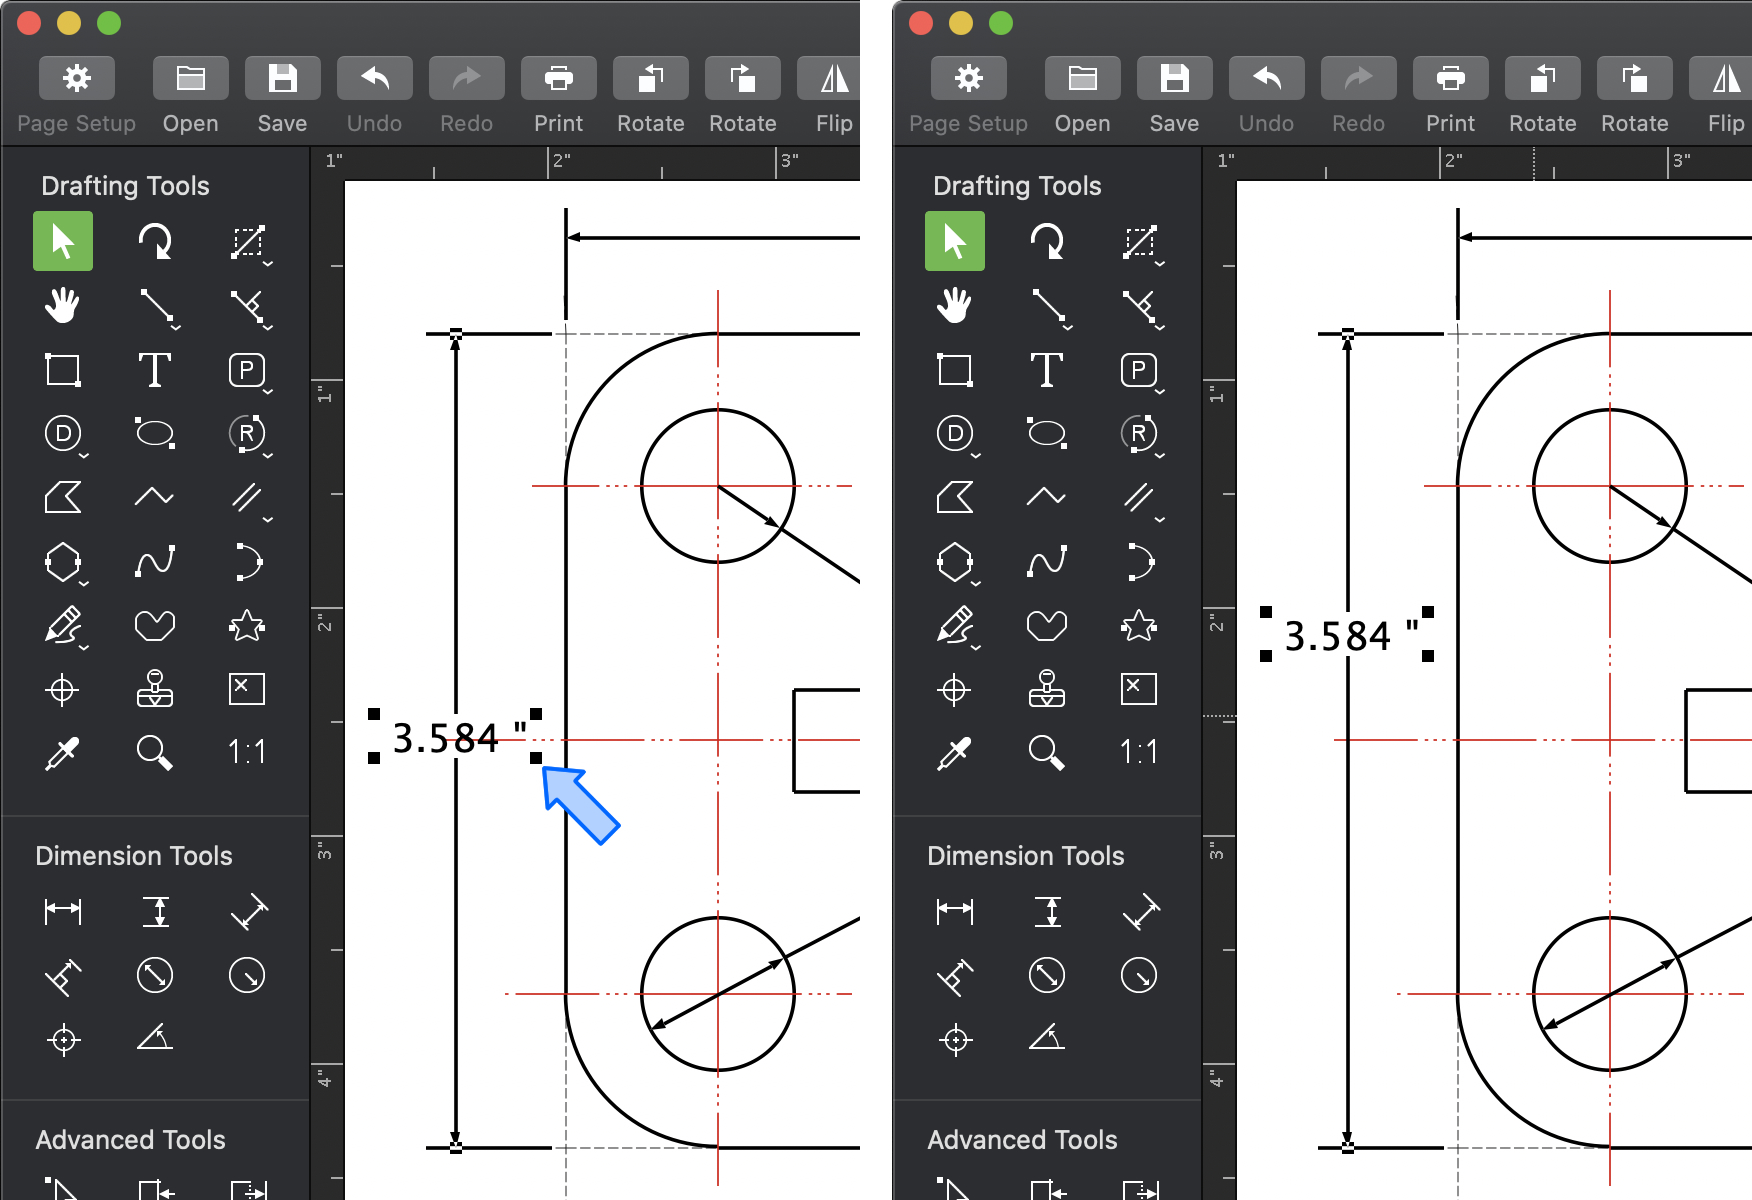
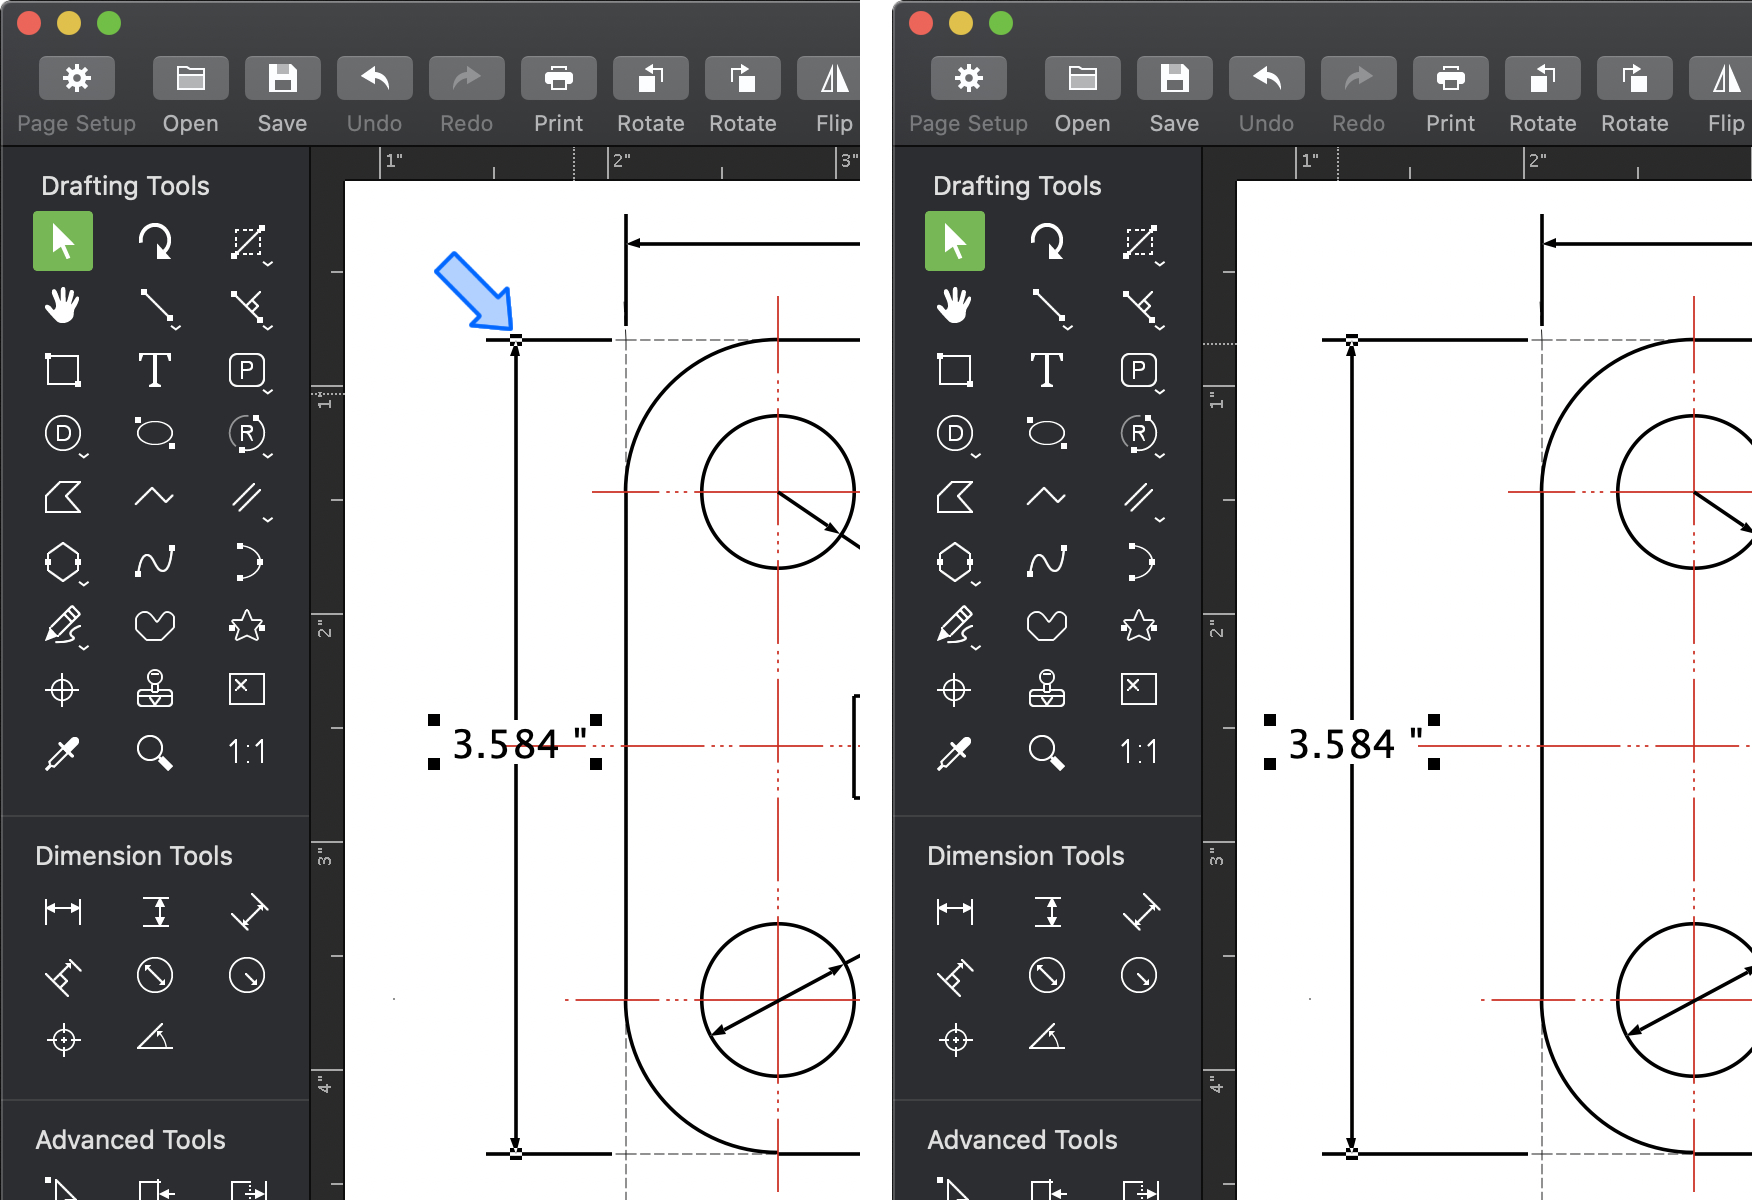
Once you have placed your dimensions you can edit their position. Look at the placement of the vertical dimension we have drawn, the text is close to a line making it difficult to read. Lets move it up slightly.
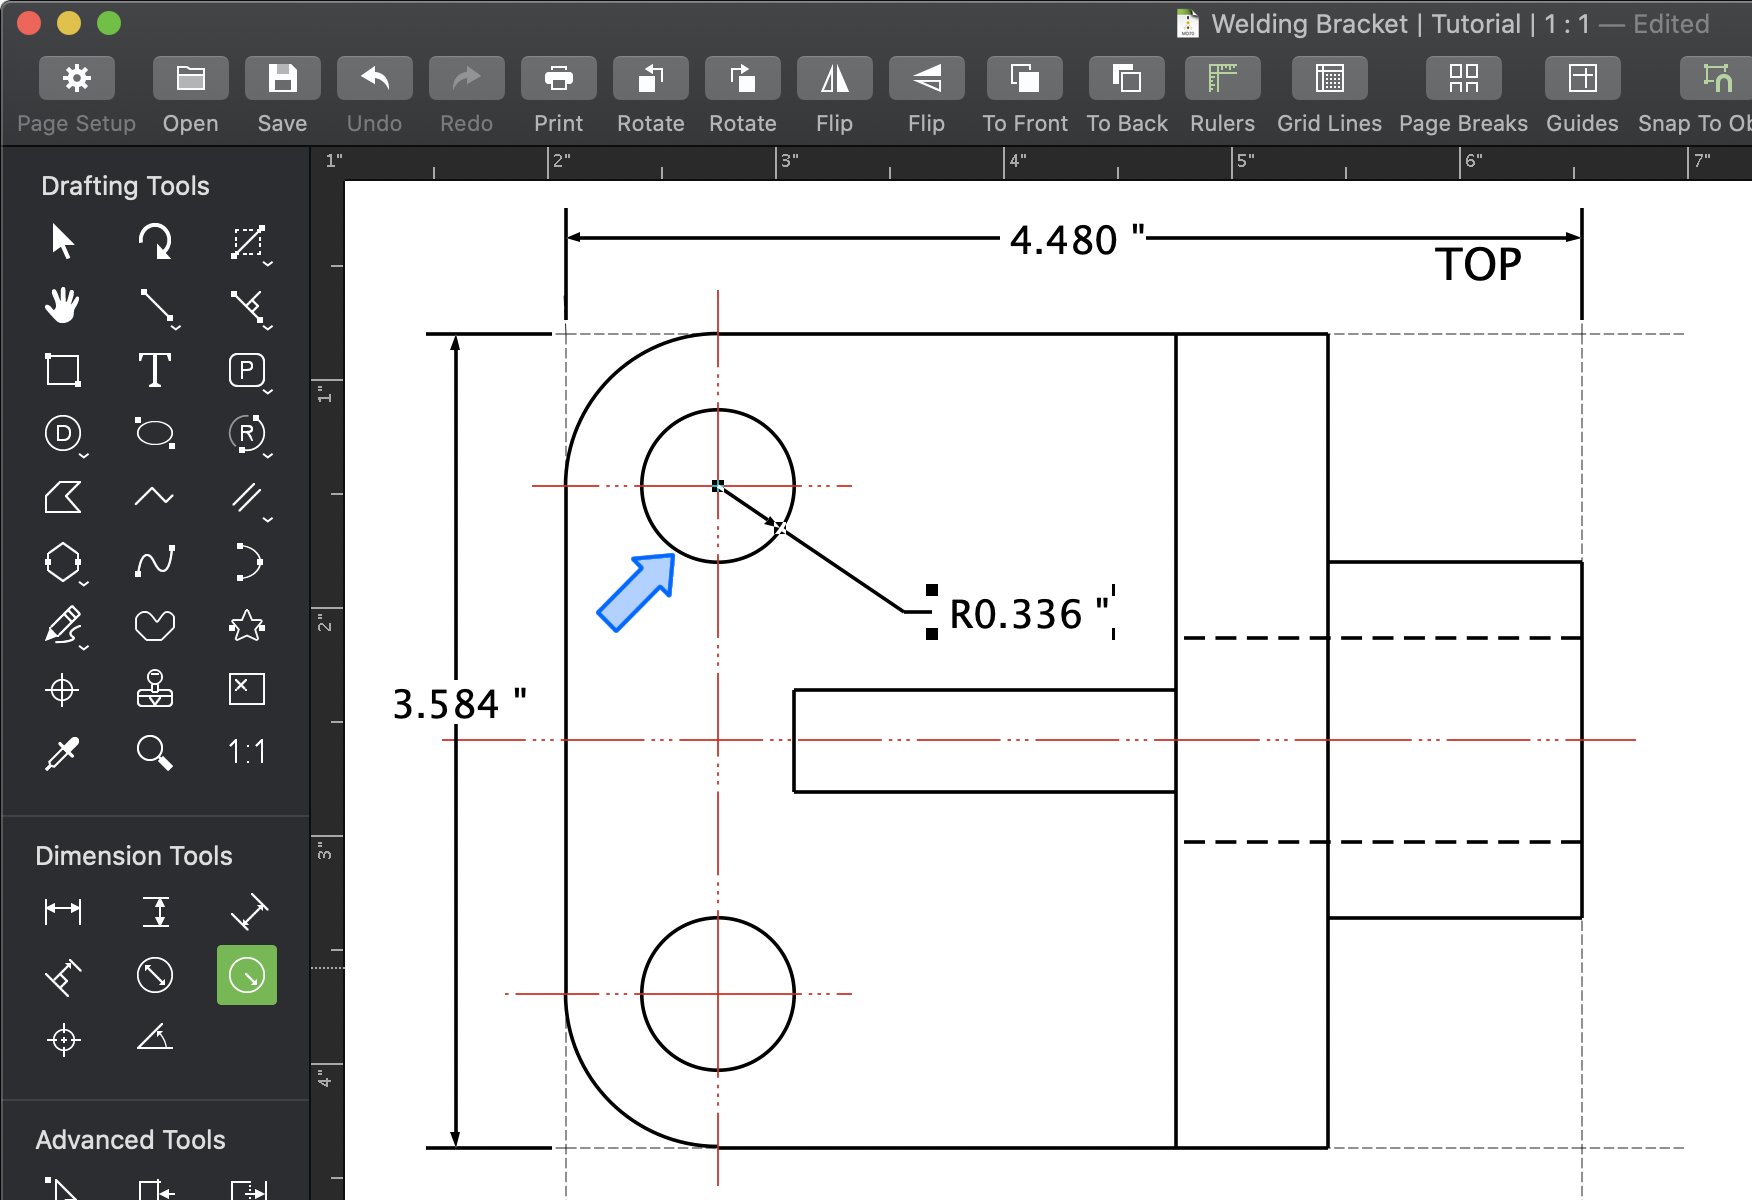
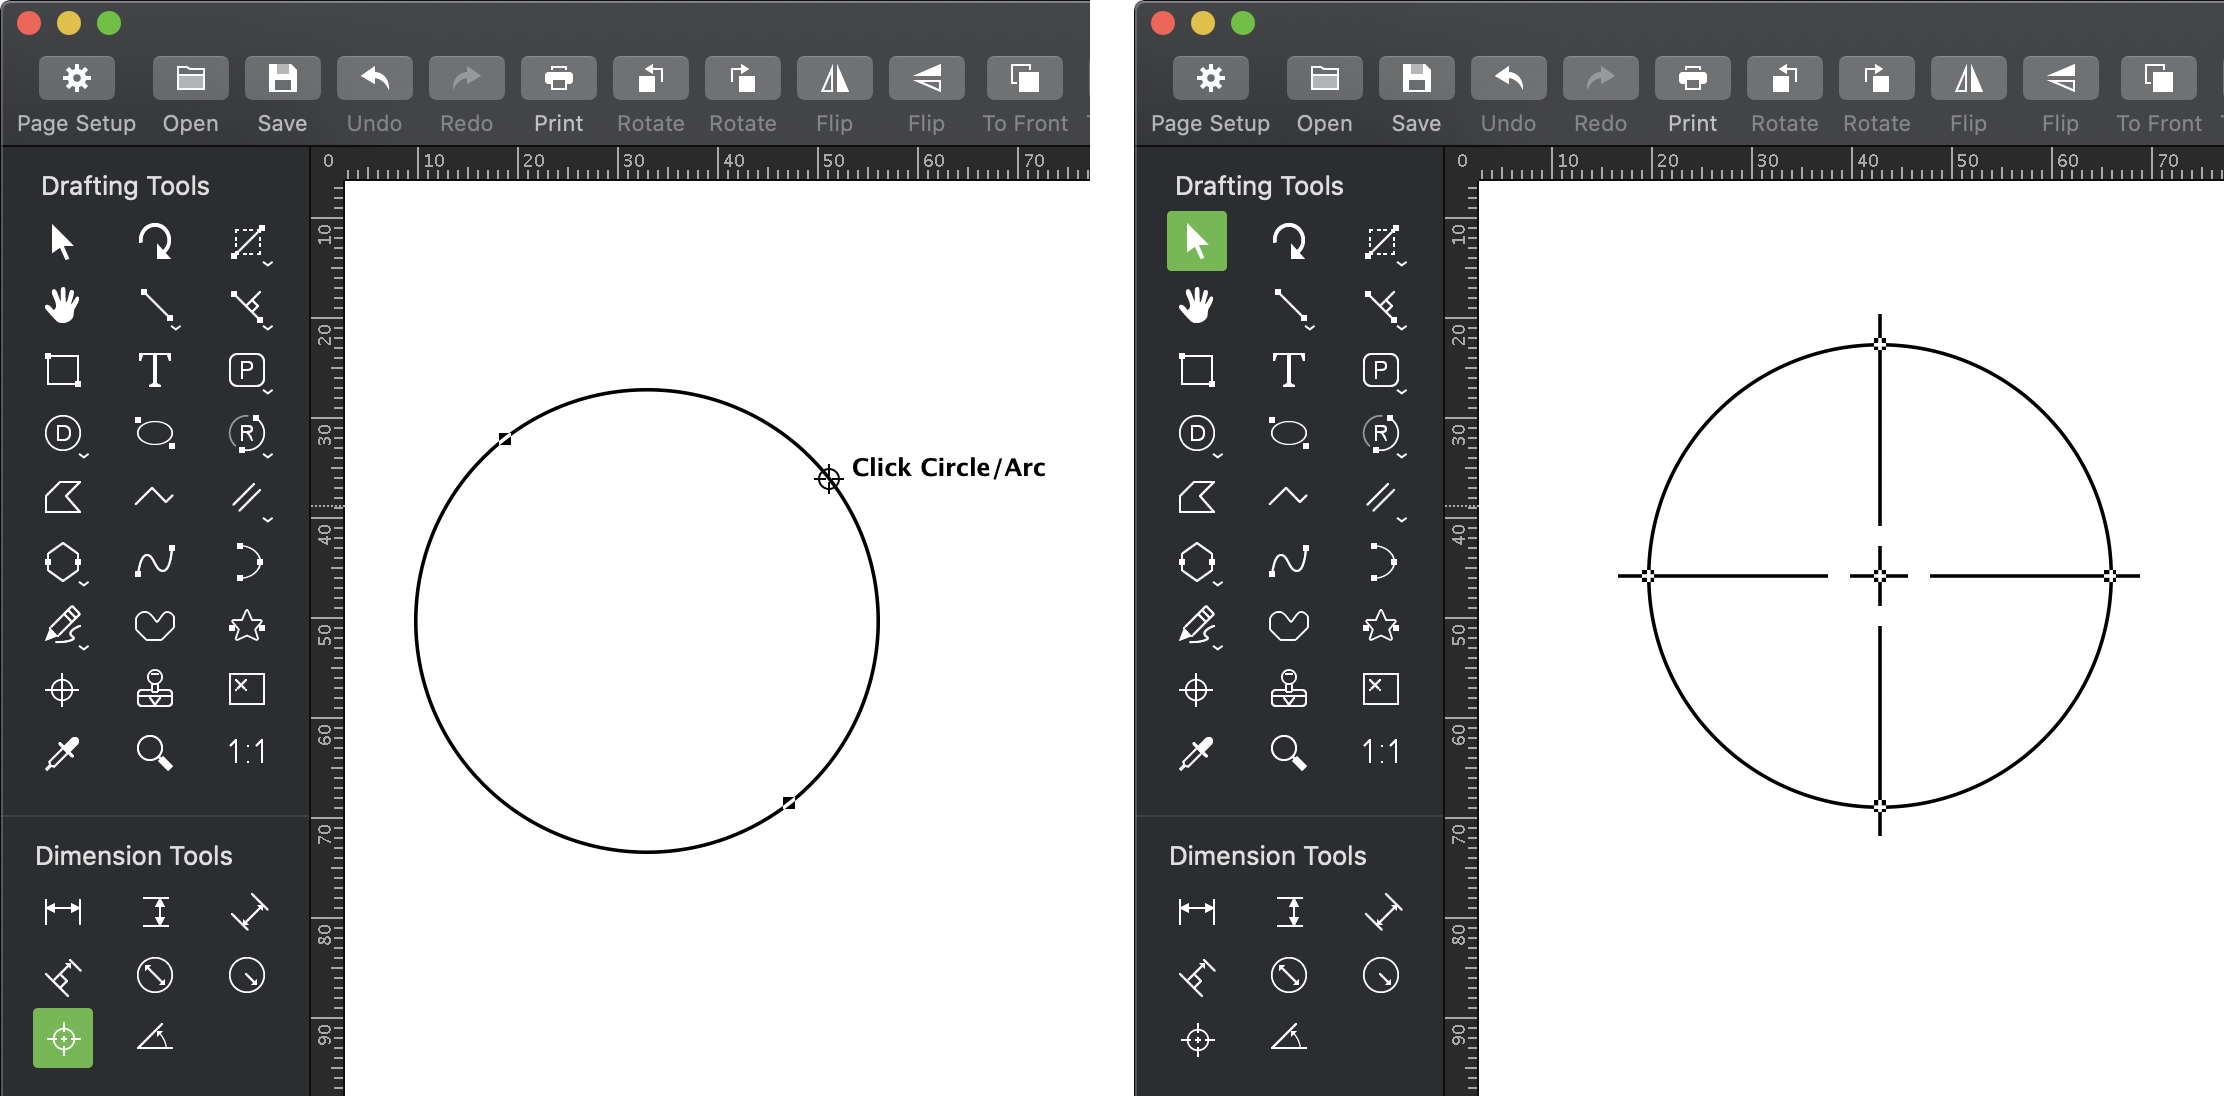
One of the tools in this toolset isn’t infact a dimension tool. The circle center mark is used to create a crosshair to identify the center of circles and arcs. It is very easy to use, lets try it.
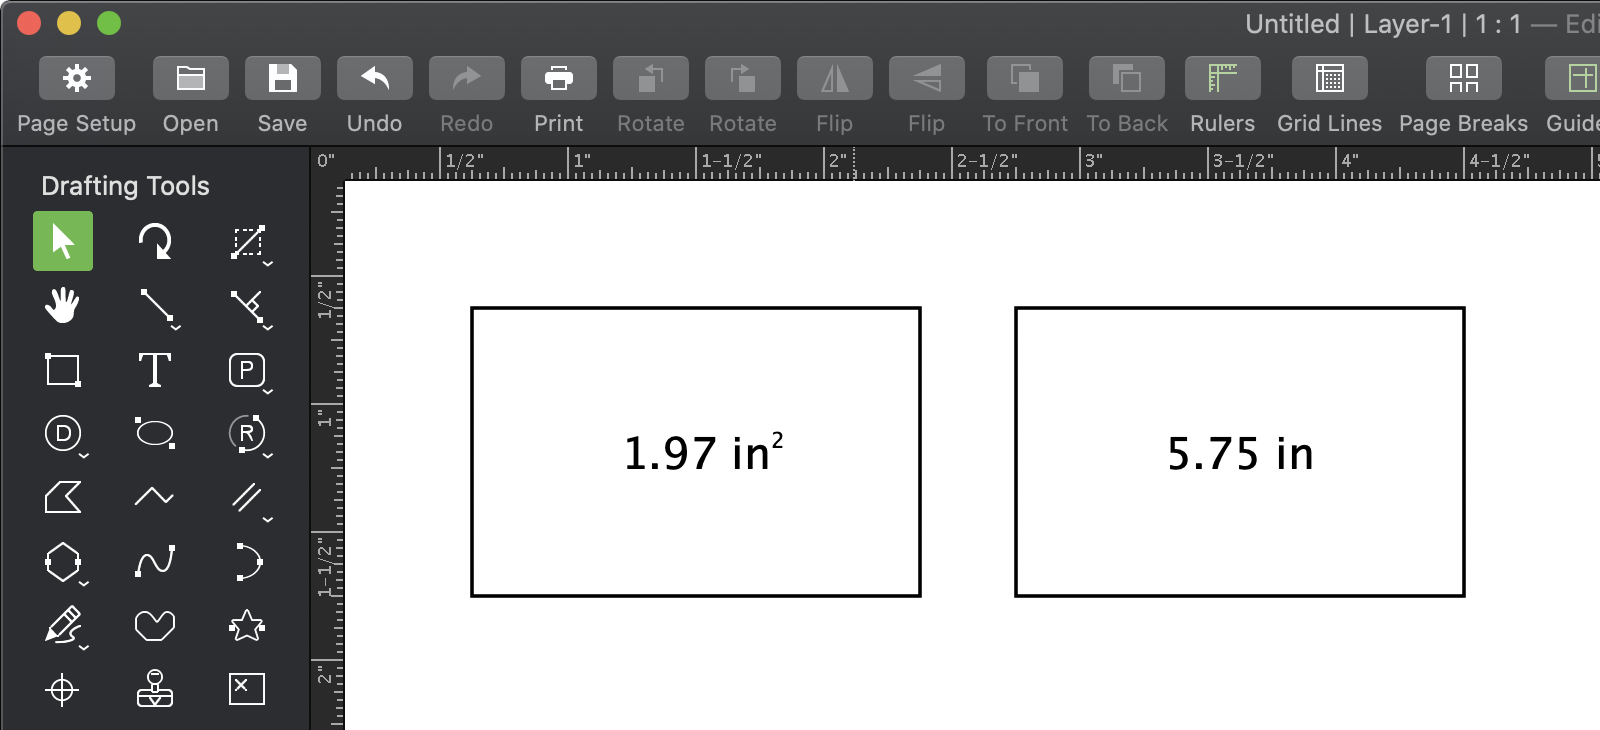
Step 4 - Show Area/Show Perimeter
Although not part of the dimension tool toolset, the Show Area and Show Perimeter tools should get a special mention here. They are very easy to use and allow you to show the area or perimeter of the selected shape. To do this simply:
Advanced Step (MacDraft Pro users only) - Linked & Unlinked Dimensions
By default, dimensions in MacDraft Pro will be linked to the object they are measuring. What this means is that should you resize that line, rectangle or circle (or anything else) the attached dimension will automatically update to show the new size.
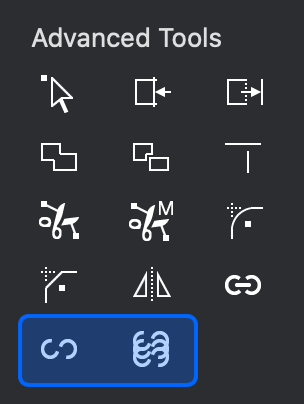
In MacDraft PE these dimensions wouldn’t have been attached to the object and instead, when you resized the rectangle, the dimension would have stayed where it was, this is called an Unlinked dimension. MacDraft Pro users can select their linked dimensions and unlink them should they wish to, using the Unlink or Unlink All tools in the Advanced Tools section of MacDraft.
Advanced Step (MacDraft Pro users only) - Dimension Format
There are many advanced settings you can apply to selected dimensions or to all future dimensions within the Dimension Format dialog. This can be found on the Dimension section of the Properties panel (first tab in the right hand panel). Select a dimension then click on the Dimension Format button to reveal the dimension format dialog.
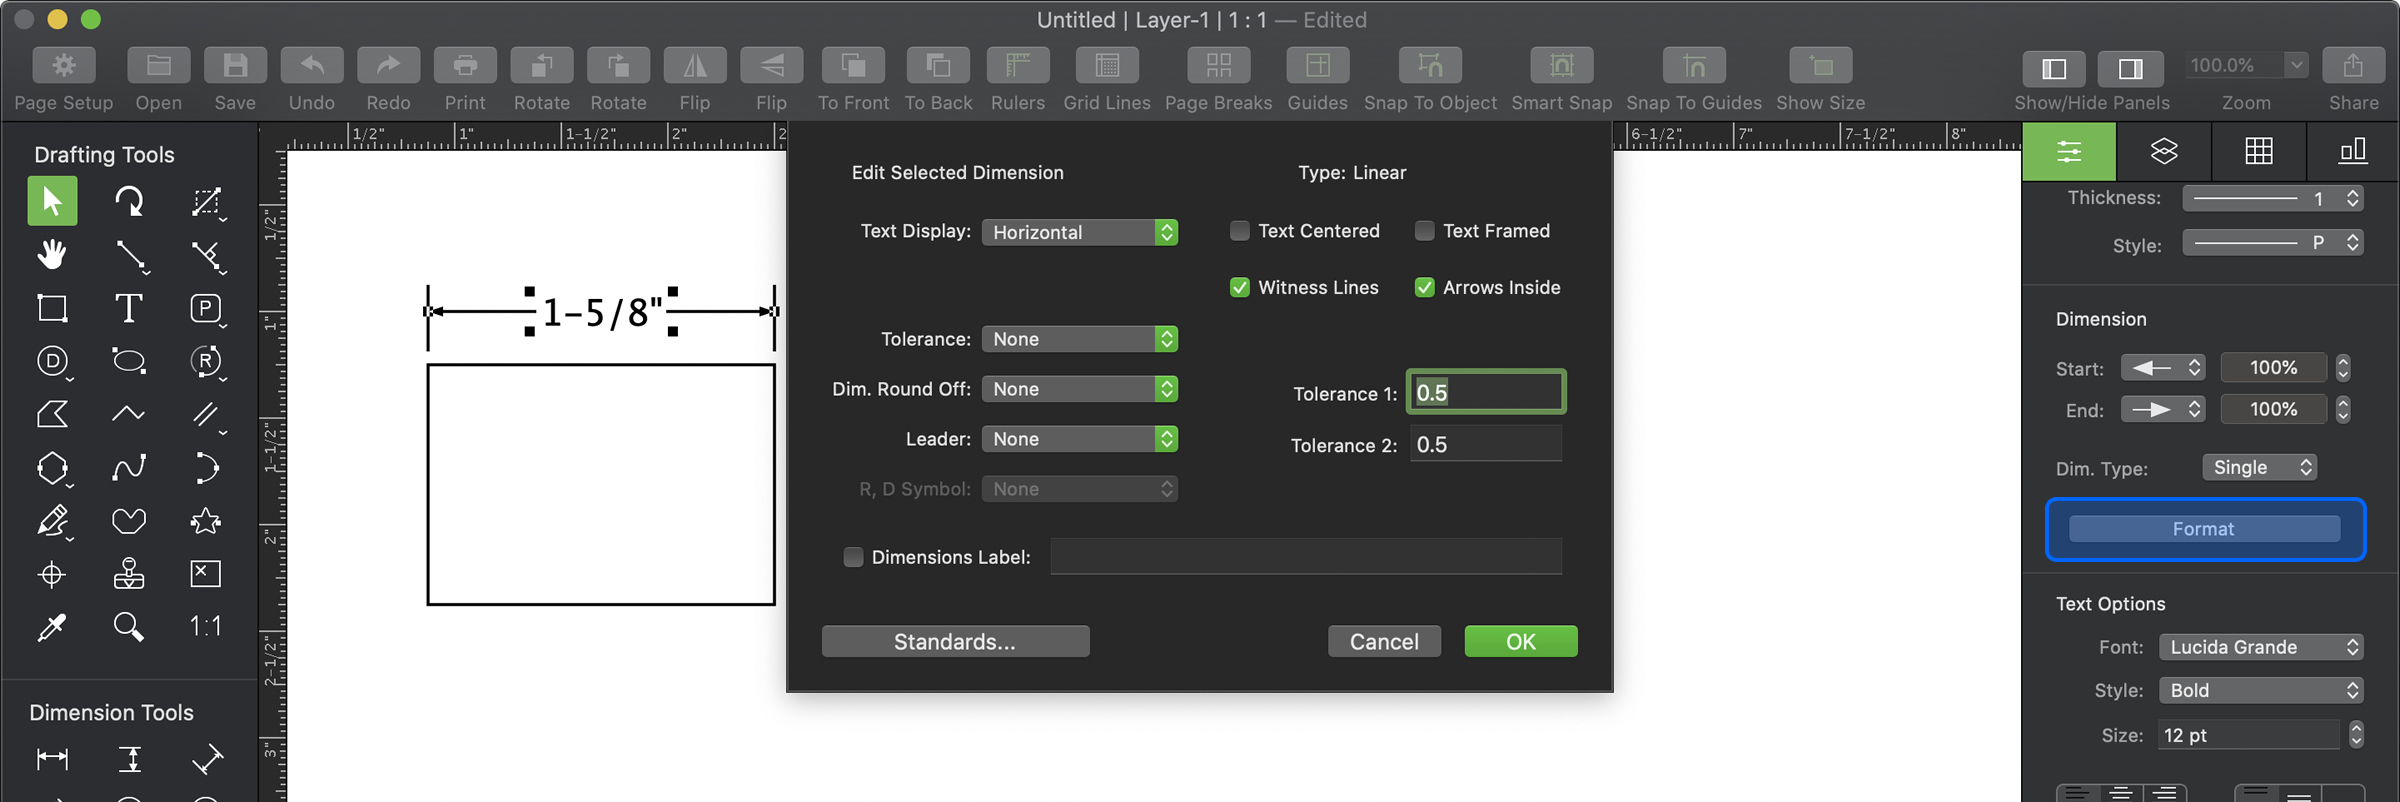
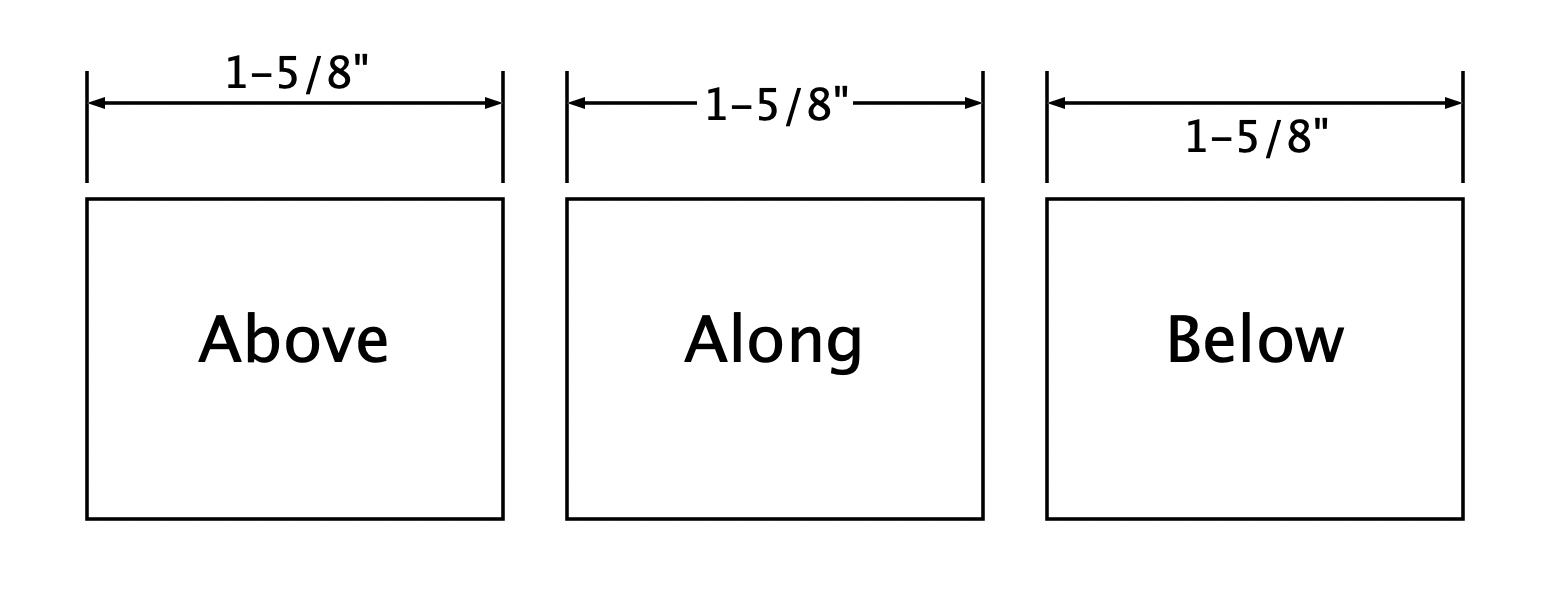
The Text Display option defines the vertical alignment of your dimension text. You can have it appear above, along or below the dimension line.
You can show or hide the witness lines, add a frame around the text, center the text on the dimension line and add the arrows to the outside of the dimension line (inside by default). You can also set your tolerances, leader and dimension round off here too.
Advanced Step (MacDraft Pro users only) - Using the advanced dimension options
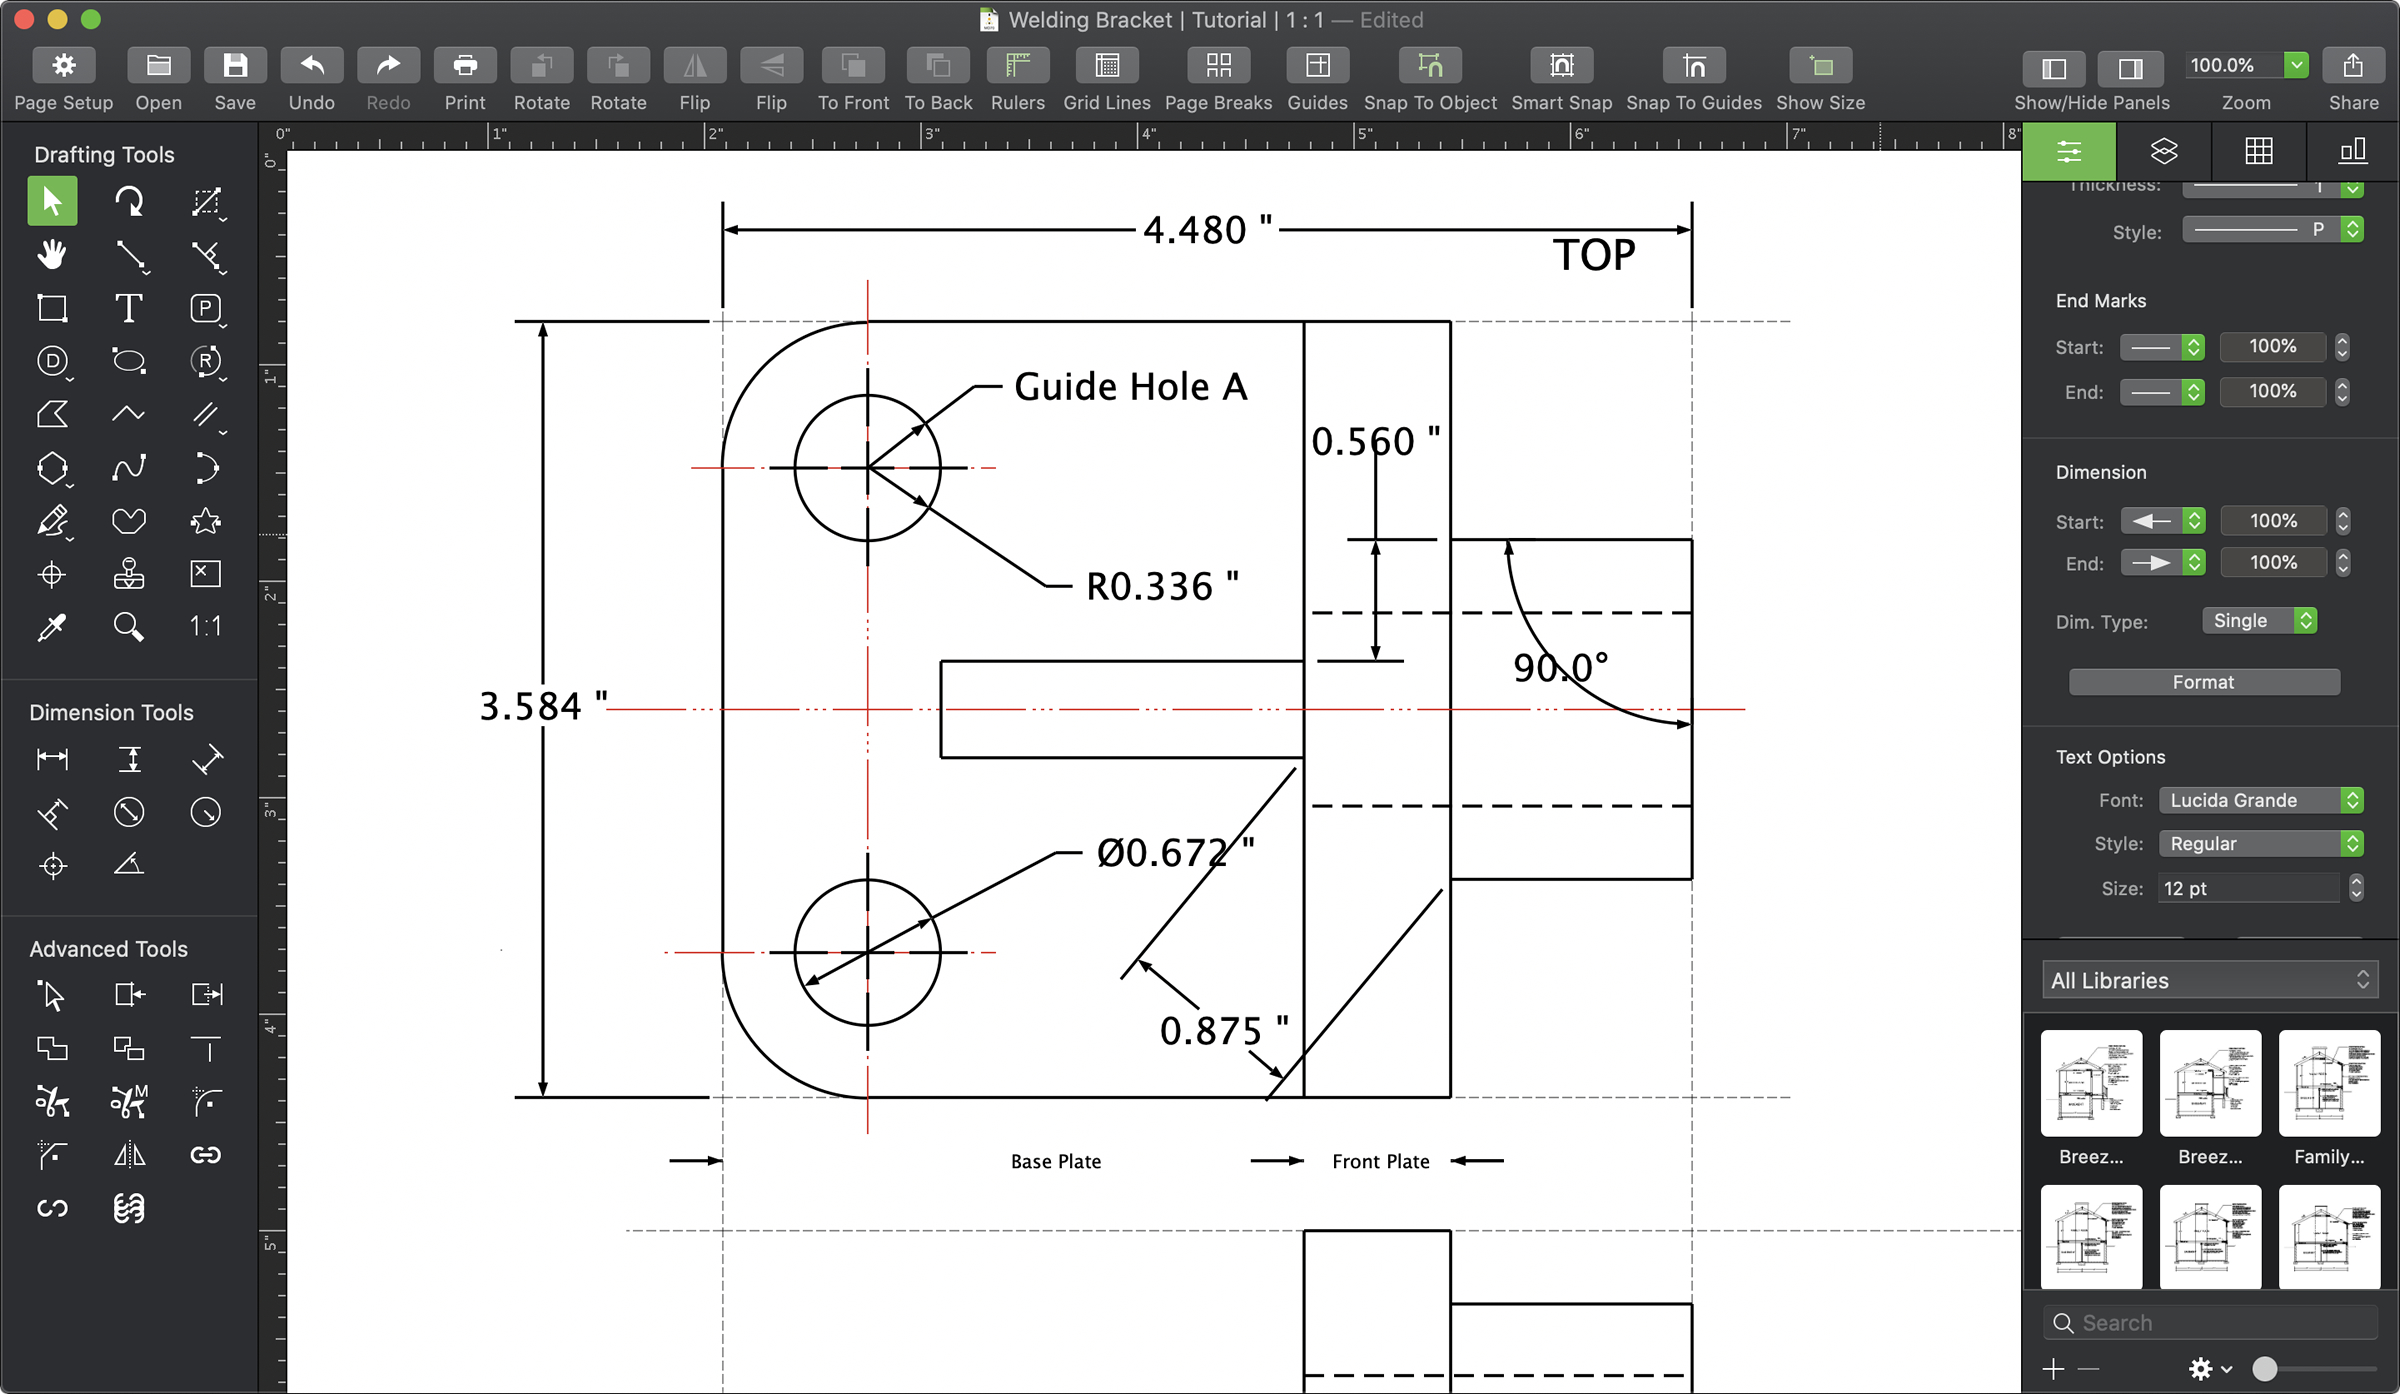
Using the Welding Bracket.md70 file, zoom in on the Front view of the drawing.
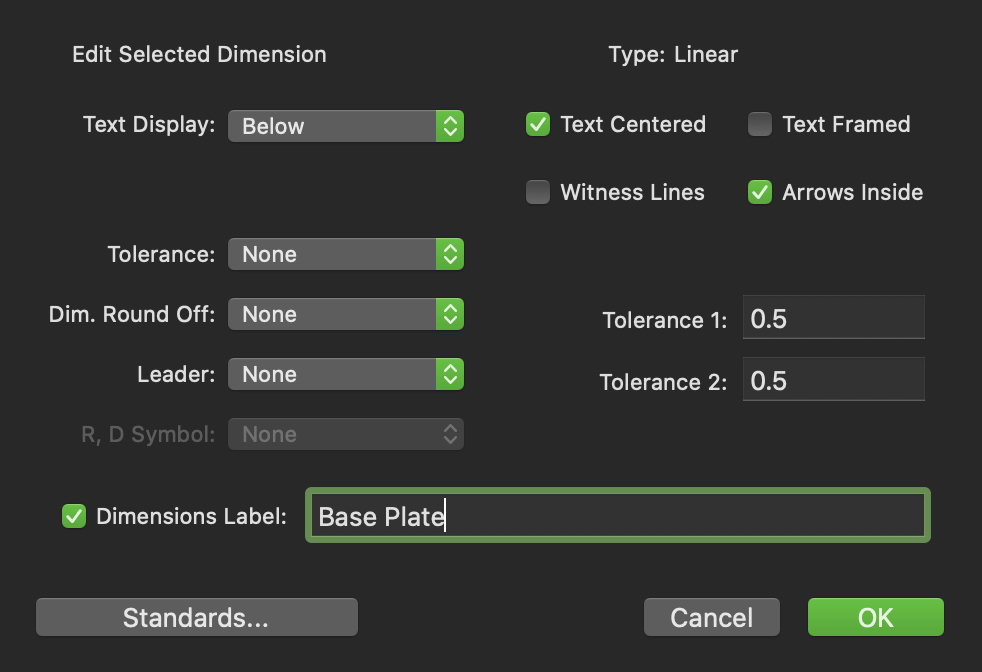
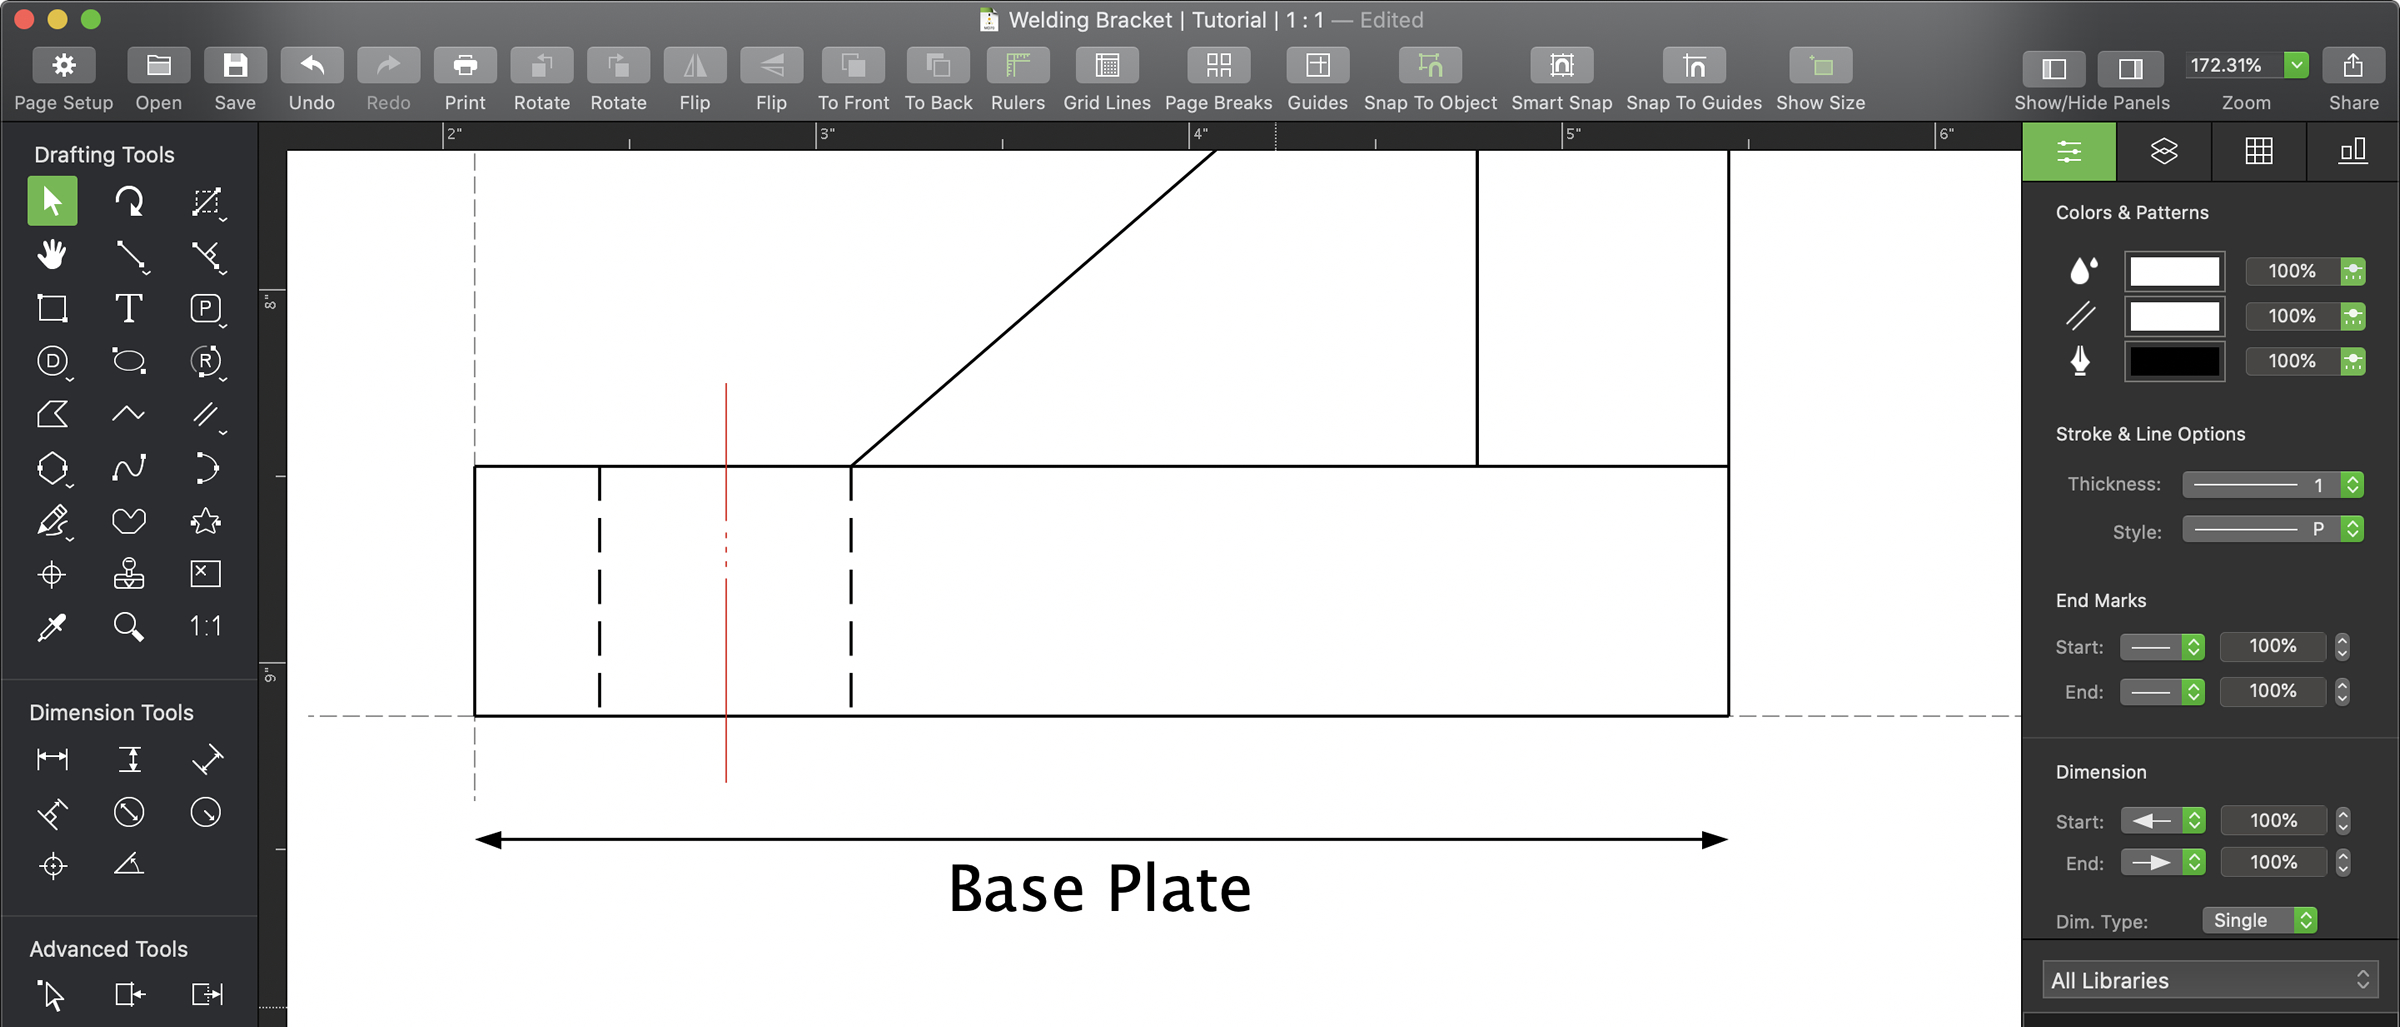
As you can see we have replaced the dimension itself with a label. This is a very powerful tool which will allow you to write whatever you want on your dimension lines.
Take your time to use the rest of the dimension tools in this document or your own. Although each tool has its own unique characteristics, the way you will use each one will be the same, its as simple as placing your points then placing the dimension itself.
Summary
With this tutorial you should now be familiar with creating, editing and formatting your dimensions. Experiment with the skills you have learnt and start to markup your drawings with dimensions and custom labels all formatted to your needs and the level of precision required.